Thursday, April 29, 2010

Frosted


Our latest assignment for  HBin5 was a sweet one in honor of May Day (which is Saturday of course, so go make some little basket thingies and hang them on your neighbors' doors. Or if you are like me and have never actually met any of your neighbors, but suspect a few of them may be complete jackasses if not actual criminals, skip it.). Specifically, we were to make ½ recipe Chocolate Espresso Whole Wheat Brioche for Cinnamon Crescent Rolls with Cream Cheese Icing (Pages 294-296) and ½ recipe of dough for a loaf of Milk and Honey Raisin Bread (Pages 270- 271). Again, I'm a hack, and I blew off the chocolate dough in favor of a whole batch of Milk and Honey. I added a bunch of chopped dried dates to the recipe and used it to bake a small loaf (made for kick ass toast, I tell ya) and these swirly treats. I don't often bake for breakfast, but with this dough lying around I couldn't resist. It makes gooood sticky buns. Top them with leftover Pumpkin Maple Buttercream and you've got it made.

Milk and Honey Sticky Buns
Ingredients:
1/2 recipe of Milk and Honey Raisin Bread Dough from Healthy Bread in Five Minutes a Day
1/2 cup brown sugar
 2 tsp. cinnamon
1/2 cup chopped pecans

Preparation:
Grease a cake pan and line with parchment paper, set aside.
Floor your board or counter well and roll dough into a 1/4 inch thick rectangle. You can also do this on a silpat mat. Makes for easier cleanup! Toss pecans, sugar and cinnamon together and sprinkle over dough. Roll dough into a log and slice into 1/2 inch slices. Arrange slices in the cake pan and allow to rest at room temperature for 45 minutes.
When ready to bake, preheat oven to 350 degrees. Bake for 20-25 minutes or until tops are golden. Flip out of pan and serve upside down, smeared with buttercream or icing.


p.s. If your wondering what kind of wack job puts frosting on toast, yeah, that'd be me. When offered the choice between this melty gooey buttercream and plain ol' butter, there isn't even any discussion to be had.

p.p.s. Anyone else notice that Blogger is being completely annoying lately? Changing fonts without prompt, only allowing photos uploaded with Picassa or url's... what the f, Blogger. You're lucky I'm too cheap to pay for a blog host :P

Wednesday, April 28, 2010

Sugar and Spice and Everything Nice...

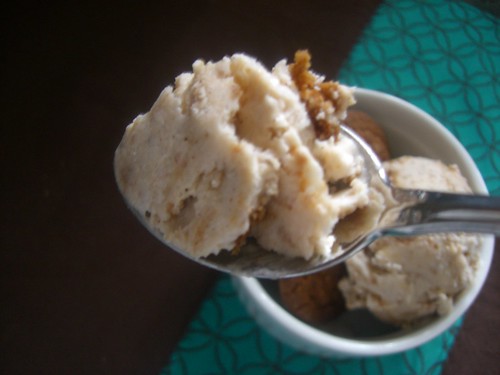
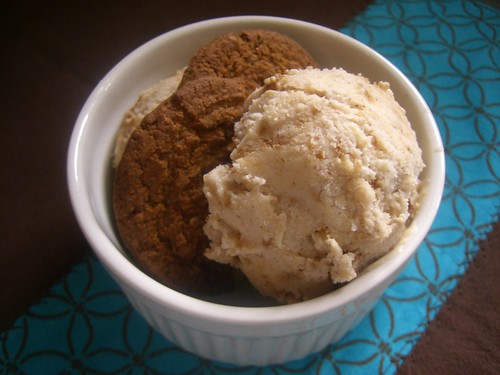
that's what this ice cream is made of. And by "everything nice" I mean fatty fat milk fat. Yum. This week's IHCC theme is Spice Caravan, and we are all meant to dig into our spice cabinets for little used spices or to pair new spices together to create new flavors. I have a bit of a spice problem. It's not quite as bad as my food hoarding pantry issue, but it's a hurdle. I had to get creative and build a little stacking unit to store all of my spices and still keep them all within reach. I have a thing for spice blends in particular and I admit, I rarely use them. The best and most sadly neglected is a Chai spice blend I've used only once, for one of my favorite cookie recipes. I needed to break in my new ice cream maker, too, so I went hunting.

I discovered Mark Bittman's NY Times post about using cornstarch for ice cream instead of egg based custard. Having never made ice cream, I don't have any bias about methods or recipes, so I figured it makes sense to start with the most controversial (if you would call ice cream controversial, which you wouldn't unless you're a total food snob, and then there's no way you'd be reading my blog). I took Mark's method and added my own flavorings to make what turned out to be an incredibly creamy, smooth, and fabulous dessert. If you have an ice cream maker, make this.

Chai Spiced Ginger Crunch Ice Cream 
Adapted from Mark Bittman's recipe for Cornstarch Ice Cream

Ingredients:
1 1/2 cups low fat milk
1 cup heavy cream
pinch of salt
1/2 cup sugar
1 tsp. vanilla extract
2 tsp. chai spice blend (or make your own blend)
3 Tbls. cornstarch 
1/2 cup crushed ginger snaps (about 6-8 cookies)


Preparation:
Reserve 1/2 cup of milk. Mix remaining milk, cream, sugar and salt in a saucepan over medium-low heat. Cook until mixture begins to steam.
In a bowl, whisk cornstarch, chai spice, and remaining  milk; there should be no lumps. Add cornstarch mixture to pot. Cook, stirring, until it starts to thicken and barely reaches a boil, about 5 minutes. Immediately reduce heat to very low and stir for 5 minutes or so until thick. Stir in vanilla extract.
If mixture has lumps, strain it into a bowl. Chill until cool, a couple of hours (you can skip this step if you have a machine with a built-in freezer). When cool or if there are no lumps, pour into an ice cream machine and freeze according to the manufacturer’s instructions, adding ginger snaps at the end of the process.

Print the recipe!

Tuesday, April 27, 2010

Banishing the bikini

I know, I said I was on a health kick. No more. The bikini conundrum disappeared in a puff of smoke  along with my hopes of tagging along for "Jessica and Nick's Babe-alicious Bachelor/Bachelorette Bash in Vegas" when last minute flights went up to $650. I celebrated my slide back into normal eating with the purchase of the ice cream maker attachment for my Kitchen Aid mixer, and a recipe to use up a bunch of Easter candy that was still sitting in my pantry.

If you live anywhere near Rhode Island, you may have visited a Newport Creamery. If so, you may have ordered a Brookie sundae, and if not,  too bad, so sad! Approximately 85% of my frends and family members worked at Newport Creamery in high school, and it was THE hot spot for pre-gaming on a Friday night. Well, at least the parking lot was. Brookies were like gold in that joint, and I know plenty of people who snuck them from the kitchen to scarf down with zero concern for calorie content. Ah, the teenage years. A brookie is a brownie base topped with a layer of chocolate chip cookie. Topped with ice cream, caramel sauce, hot fudge, and whipped cream, it became a brookie sundae, my drug of choice for a long time. I've recreated it with candy additions because, well, I can.

Candy Shop Brookie Bars
Ingredients:
1/2 recipe of Brownie Batter (go ahead and use a boxed mix, or your favorite recipe)
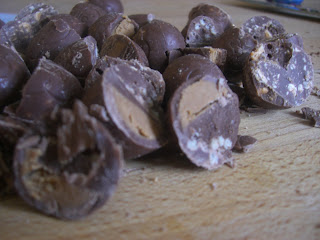
1 cup chopped chocolate candy (I used Nestle chocolate eggs with Butterfinger, Crunch, and peanut butter fillings, aka Candy Crack!)

Preparation:
Grease the bottom and sides of a 9x9 inch glass baking dish and line it with parchment paper. Preheat your oven to 350 degrees.

Pour brownie bater into the prepared pan. Sprinkle chopped candy over the batter. Drop cookie dough by rounded Tablespoons over candy layer.

Bake for 40- 45 minutes or until a toothpick inserted in center comes out clean. Allow to cool completely before removing from pan and slicing into bars. Top with ice cream, caramel sauce, hot fudge, and whipped cream to make your sundae!

Saturday, April 24, 2010

And the winner is...

Congrats to Jessica, the winner of the Yoplait Greek Yogurt Giveaway! I feel a little guilty since she's the only entrant that I actually know in real life, but hey, ya can't fool the random generator! Have fun in Vegas chica, your gift pack is on its way! Thank you so much to everyone who participated and check back soon; I have another foodie friendly giveaway in the works :)

No kids, THIS is the cheesiest.

It's Potluck week at IHCC, which simply means you can make any recipe that you choose from Mark Bittman's ridiculously lengthy list of offerings. I ended up skipping all of Nigella's Potluck weeks since I could never make up my mind, but I am trying to be better now. It's still overwhelming to pick one thing when I've already bookmarked over a dozen recipes in the two books I have, plus the 10 more I bookmarked online. In order to quit waffling, I went back to the pantry. I have far too many boxes of pasta, since E won't eat it (I know! How the hell did I marry someone who doesn't really like pasta?) and I keep buying it anyway. I also had too much cheese in the fridge (if that's possible) and a bunch of prosciutto that I bought with a plan in mind and then forgot about. I do that more often than I'd like. I ended up with another recipe from the Basics book, and added a few ingredients to make it more grown up (although honestly, E would have been just as happy if I had mixed in ketchup and hot dog slices). It was the bomb. For reals. I could have eaten it straight from the pot without the baking step and been happy as a clam.

Baked Macaroni and Cheese with Prosciutto and Peas
Adapted from Mark Bittman's How to Cook Everything: The Basics

Ingredients:
Salt
2 1/2 cups low fat milk 
2 bay leaves
1 pound whole wheat ziti
3 tablespoons unsalted butter
3 tablespoons all-purpose flour
2 cups grated sharp cheddar
1/2 cup freshly grated Parmesan cheese
6 slices Prosciutto, sliced into strips
1 cup peas
Freshly ground black pepper
1/2 cup or more bread crumbs

Preparation:
Preheat the oven to 400°F. Bring a large pot of water to a boil and salt it. Boil ziti until just under al dente (about 10 minutes). Drain and rinse with cold water, set side.

Cook the milk with the bay leaves in a small saucepan over medium-low heat. When small bubbles appear along the sides, about 5 minutes later, turn off the heat and let stand.

In the empty pasta pot over medium-low heat, melt 3 tablespoons of the butter; when it is foamy, add the flour and cook, stirring, until the mixture browns, about 5 minutes. Remove the bay leaves from the milk and add about 1/4 cup of the milk to the hot flour mixture, stirring with a wire whisk all the while. As soon as the mixture becomes smooth, add a little more milk and continue to do so until all the milk is used up and the mixture is thick and smooth. Add the cheddar and stir.

Add pasta to the sauce, toss in the Parmesan, and sprinkle with salt and pepper (be wary of the salt here, since prosciutto is already very salty. You'll want to taste it before adding too much!). Add prosciutto and peas and toss to coat. Grease a 9 x 13-inch or similar-size baking pan and turn the pasta mixture into it. Top liberally with bread crumbs and bake until bubbling and the crumbs turn brown, about 15 minutes. Serve piping hot.*

* Mark's words, not mine. I don't think I've ever said "piping hot" with a straight face.

Friday, April 16, 2010

Yo! It's another giveaway!

Ever notice how a food trend picks up speed, beginning humbly in some little chef's kitchen, before rolling through the city, stopping in every gastro-pub, making its mark on food bloggers, and then crash landing and destroying itself on top of some mass market food conglomerate? It happened to "smashed potatoes," it happened to chipotle and wasabi (E was "so over it" when he found wasabi mayo at Wendy's), and now it's moved on to Greek yogurt. I know that Greek yogurt isn't really a trend since people have eaten it for hundreds of years, but you know it's caught on big time when your local Stop n' Shop begins carrying more than just Fage. And you know it's on like Donkey Kong when the big yogurt companies jump on board. I've always bought Fage, and sometimes Chobani if I am looking for the convenience of a smaller, fruit-filled container. Now that Yoplait makes Greek yogurt, I figure the trend is now a food staple.

I was able to test out the Yoplait Greek Yogurt thanks to the Yoplait and MyBlogSpark peeps. Here's what they had to say:


"With 12 grams of protein -- twice that found in leading yogurts-- new YoplaitGreek nourishes from the inside out. Available in four delicious flavors, Strawberry, Blueberry, Honey Vanilla and Plain, the brand´s newest offering has a unique thick and creamy texture with the unmatched taste expected of Yoplait."

Well, I wish I had more of that good news. I tried the plain and strawberry flavors, and E tried the honey vanilla. While the plain yogurt is good, and definitely something I'd use in my cooking (it's fat free, too, woo!), I won't be eating the strawberry yogurt again. It was grainier than I'm used to, very blah in flavor, and when I read the label... Ouch! 18 grams of sugar! I think I'd prefer to stick to my plain yogurt and add my own fruit, thank you very much. For the record, E's response to the honey vanilla was, "eh." I asked him to elaborate and he said the consistency was "weird." I definitely recommend stocking up on the plain yogurt for mixing into smoothies or soups, to make tzatziki, or this awesome Curried Chicken-Salad with Red Grapes and Walnuts. I'll certainly buy it again, as long as it's on sale (remember, I'm sooo cheap).

Now the Yoplait and MyBlogSpark folks were kind enough to send me the yogurt coupons and a gift pack to "Nourish My Inner Goddess," which included a bunch of fun spa goodies. And you can have one, too. Yup, it's giveaway time.

The Prize: A "Nourish Your Inner Goddess" gift pack including 2 coupons for free Yoplait Greek Yogurt, a terry cloth bath wrap, bath sponge, wooden massager, washcloth, brush, and spa slippers.

How to enter: All you need to do is leave me a comment letting me know you're interested. Please don't forget to leave an email address so I can contact you!

Contest ends Friday, April 23rd at midnight EST.


You can also download and print a coupon for the yogurt Here!

Tuesday, April 13, 2010

It's about time...

... that I feature some real food! Something that isn't bread, or a brownie, or even a soup. An actual meal, for the love of Pete! I know, I know. I realize that most of my posts have been carb-loaded-sugar-filled-fatty-frenzies lately, due in part to the Easter holiday and also to the fact that I'm baking my way through a bread book. I've been exercising a lot of it off, but I very well may have to put on a bikini in two weeks, so we are in full fledged health mode in this house until then. Thank God for Mark Bittman.

After all of the votes were counted and Mark Bittman beat out Bobby Flay as the new I Heart Cooking Clubs Chef, I did a little jump for joy, rhetorically speaking. I'm not that weird. I kind of hate Bobby Flay. And I kind of heart Mark Bittman thanks to his many Today Show appearances. I marched off to the library to grab a few of his books and got to work on this week's challenge: Raiding the Pantry.

Now there's a challenge that is right up my alley. See, I have a problem. I am a food hoarder. This is my pantry. The shelves are 24" by 32" and there's another one up top that I couldn't fit in the photo. There are only two people living in this house, but when the zombie apocalypse strikes, even if it is only in my husband's head, we are ready. We could stay hidden in this place with enough food for at least 7 months, more if I carefully ration the oatmeal.

Flipping through the book How to Cook Everything: The Basics, there were honestly only a few recipes that really jumped out at me. It's a very basic book (hence the title, I'm a genius) and would make a great gift for a college kid who can't cook, but it's a tad elementary for me. That said, there is still some good eatin' in here, like the Cold Noodles with Sesame Sauce. With a few additions it made a perfect dinner! Make the noodles in advance and it's also super fast.

Orange Sesame Grilled Chicken with Cold Soba Noodles
For chicken:
Ingredients:
2 chicken breasts cut into strips
1 Tbls. sesame oil
1 Tbls. soy sauce
1 1/2 Tbls. rice wine vinegar
Juice and zest of one large navel orange
1 tsp. ground ginger

Preparation:
Place chicken in a ziploc bag or shallow dish.
Whisk remaining ingredients and pour over chicken. Marinate at least 3 hours or overnight. Cook on a preheated grill or grill pan for 3 or 4 minutes per side to cook through.

For noodles (everything but the scallions was from the pantry, woo!):
Ingredients:
12 oz. buckwheat soba noodles
1/2 cup tahini (or you can use peanut butter)
2 Tbls. sesame oil
1 Tbls. sugar
1/4 c. soy sauce (I use reduced sodium)
1 Tbls. rice wine vinegar (I use the Lite version)
1 tsp. Sriracha Hot Chili Sauce (we are so addicted to this stuff!)
salt and pepper
3 scallions, sliced thinly
1 Tbls. sesame seeds
Preparation:
Cook soba noodles in salted boiling water for 12 minutes, or until just tender. Drain, rinse with cold water and place in a large bowl. Toss with 1 Tbls. sesame oil and refrigerate.

Whisk tahini, sugar, soy sauce, vinegar, sriracha, and salt and pepper to taste until combined. Add a few Tbls. of hot water if it is too thick. You'll want it to be the consistency of heavy cream. You can refrigerate this also until ready to serve, but you'll need to thin it out again with more water! When you are ready to eat, toss noodles in tahini sauce and transfer to a plate. Sprinkle with scallions and sesame seeds and top with grilled chicken. Drizzle with remaining sesame oil.

This stuff was awesome, and guess what? E made most of it. Told you he can cook.

Print the Noodle Recipe


Print the Chicken Recipe

Wednesday, April 07, 2010

Moley, moley, moley!

This week's assignment for HBin5 has proven to be a challenging one. Our assignment is to mix up a full recipe of Gluten Free Olive Oil Dough (page 238-239 of Healthy Bread in Five Minutes a Dayand to then make 1 loaf of bread, a pizza, and a sesame baguette from the dough. This dough calls for soy flour, tapioca flour, and Xanthan Gum, which sparked a discussion about less costly and more readily available ingredients. That xanthum shit ain't cheap. I read along while a bunch of people started baking and subbing, and then complaining. Turns out this bread is a stank one, with a dough that smells unpleasant and a flavor to match. Not one person who has baked it thus far was very impressed. Therefore, I didn't make a gluten free bread. Blatant disregard for homework is not very me (maybe because I'm a teacher?), but I am not about to eat carbs that I don't even like. My metabolism isn't what it was. Since I decided to blow off this assignment, I went back in time to one I skipped in March: Avocado Guacamole Bread (pages 160-161).

Now, E and I adore avocados, and we especially love guacamole. I had some pretty high hopes for this dough. I made half a batch, spiked it with a rounded teaspoon of cayenne pepper, a teaspoon of cumin, lots of fresh cracked pepper, and a whole avocado instead of half. Then I shaped the dough into buns and sprinkled the tops generously with shredded taco cheese (you know, the seasoned cheddar blend you use on nachos and such). In the end they were pretty and I loved the flavor, but honestly, most of the bang comes from the cheese and cayenne. There is very little avocado or tomato flavor in the bread itself, which makes me think I should double both if I bake this again. I know some people used salsa in place of the tomato, and I think that would have been a good way to go. Ah well! Live and learn, then smear this baby with fresh avocado.

Stop by Michelle's blog and visit the Bread Braid to see the brave souls who actually made gluten free breads!

Tuesday, April 06, 2010

Nesting

I suppose it is a tad late for an Easter post, but let's just consider this a springtime in general post. I did make these little Bird's Nest macaroons for Easter, but they'd work just as well for any spring party, a baby shower, or Mother's Day. I love macaroons anytime; I even made them for our wedding. While, yes, they are on the sweet and rich side, it's all good if you only have a few!

I really wanted to put some of my very favorite Easter candies into my baking this year. You see, I'm a huge sucker for Cadbury Mini Eggs. Huge sucker. I buy bags as soon as they hit the shelves, in fear that stores will run out if I wait too long. I am known to squirrel them away for as long as possible, so I can eat them in secret and not share them with anyone else. I have even eaten a bag in a day (but thankfully that was in college, and my binging has limited itself to other areas). I didn't want to go there this year, supposed to be growing up and all that noise. So I bought one bag only, and decided to make nests from my favorite macaroons. D-Money helped with these, so I didn't even open the bag until I got to her house the day before Easter. Half the bag was smashed, so we gleefully scarfed down the broken bits and had enough left for 2 dozen nests.

Bird's Nest Macaroons
(I use Martha Stewart's recipe for the Macaroons)

Ingredients:
2 large egg whites
pinch of salt
2 Tsp. vanilla
1 can sweetened condensed milk
2 14 oz. bags of flaked coconut
Cadbury Mini Eggs

Preparation:
Preheat oven to 300 degrees and line baking sheets with parchment paper or a silpat.
Beat eggs and salt until frothy and white.
Stir in vanilla and milk.
Fold in coconut until it is all incorporated.
Using a teaspoon or a 1 inch cookie dough scoop, scoop onto baking sheets. They won't spread, so you can fill 'er up!
Bake for 20 minutes or until just golden.
Using a wooden spoon end, make small indentations in the top of macaroons. Fill each hole with a mini egg. 
Transfer to a wire rack to cool.