Sunday, August 12, 2012

Blast from the past

It's pretty obvious to anyone that I have a sugar problem. You've been spared the gory details lately (aside from yesterday's slip up) as I've been posting so much baby food, but don't let that fool you. I've just had a freezer stocked with Klondike bars and Ben and Jerry's, not to mention the constant stream of Nutella flowing out of my cupboard. I know that passing this sweet tooth on to Jude is highly likely. I know that isn't good. I'll do my best to keep him from becoming a sugar addict, which is easy right now. As long as he prefers savory to sweet foods, I'm happy to oblige. But mama has to make a treat sometime! Since it's summertime, it had better be ice cream.

Last summer I made ice cream constantly. The summer before that I made a lot of ice cream, too. This year I've been seriously slacking in the frozen treats department. I do believe that this ice cream makes up for it. I wanted to try two new things this time. 1. Make an ice cream without any sugar. You know, so I won't feel so guilty feeding it to the boy. And 2. Make a fruity flavor I've never made before.

The latter part was easy, since all I've been craving lately is Chelo's Banana Berry Pie. I worked there for an embarrassingly long part of my youth, and that pie basically fueled my double shifts. It's the stuff summertime dreams are made of. I figured since I can't have a slice or six when I need a fix nowadays, I can make it into ice cream.

Making sugar free ice cream was another issue. I refuse to use sugar substitutes, so I had to try out a juice concentrate. Cascadian Farms makes an organic grape juice concentrate without any added sugar (it's what I use for my Baby Cakes) so I started there. Subbing juice concentrate for sugar isn't such a big deal, really. You just use about 3/4 of a cup in place of every 1 cup of sugar. I was just concerned that the water in the concentrate would make for icy ice cream when what I want creamy ice cream. I figured that little trick out. The other thing about fruit ice creams is that I hate chunks of frozen fruit. It's like chomping on rocks. Hence the pureeing steps below. If you like chunky fruit in your ice cream, by all means, fork mash it, but don't say I didn't warn you.


Banana Berry Ice Cream
Ingredients:
2 cups heavy whipping cream
2/3 cup half and half
1 can of organic grape juice concentrate, thawed and divided (see below)
1 ripe banana
1 cup mixed berries (I used blueberries, strawberries, and cherries)

Preparation:
Take your can of grape juice out of the freezer and stand it up on one end in the fridge overnight to thaw. This will give you a layer of juice at the top and a layer of thick concentrated grape sludge (for lack of a better word) at the bottom. When you are ready to make your ice cream, pour off the juice and reserve for another use. Measure out 1/2 c. of the sludge into a large bowl. Whisk in cream and half and half until well blended and place bowl in the fridge.

Set up your ice cream maker. If using the KA attachment, make sure it is locked closed and set to the lowest speed. Otherwise, follow your ice cream maker instructions:) Pour in the cream mixture slowly and set a timer for 20 minutes.

Puree banana and set aside. Puree berries and set aside. Once ice cream has mixed for about 20 minutes, it should be reaching a soft set. Pour in the banana puree and half of the berry puree. Continue mixing the ice cream for another 5-10 minutes until it begins to firm up. Turn off machine and fold in the remaining berry puree. Transfer ice cream to a freezer safe container to freeze, or serve immediately.

Saturday, August 11, 2012

Gimme some

Because as my friend Andrew pointed out, "How can I have s'more when I haven't had any?" 


Yes, yesterday was National S'mores Day. If you read food blogs, I'll bet you were smacked in the mouth with all manner of fabulous takes on the classic summer sweet treat. S'mores brownies, s'mores cookies, s'mores cupcakes. The best thing to serve with all of those choices? S'mores ice cream, of course.

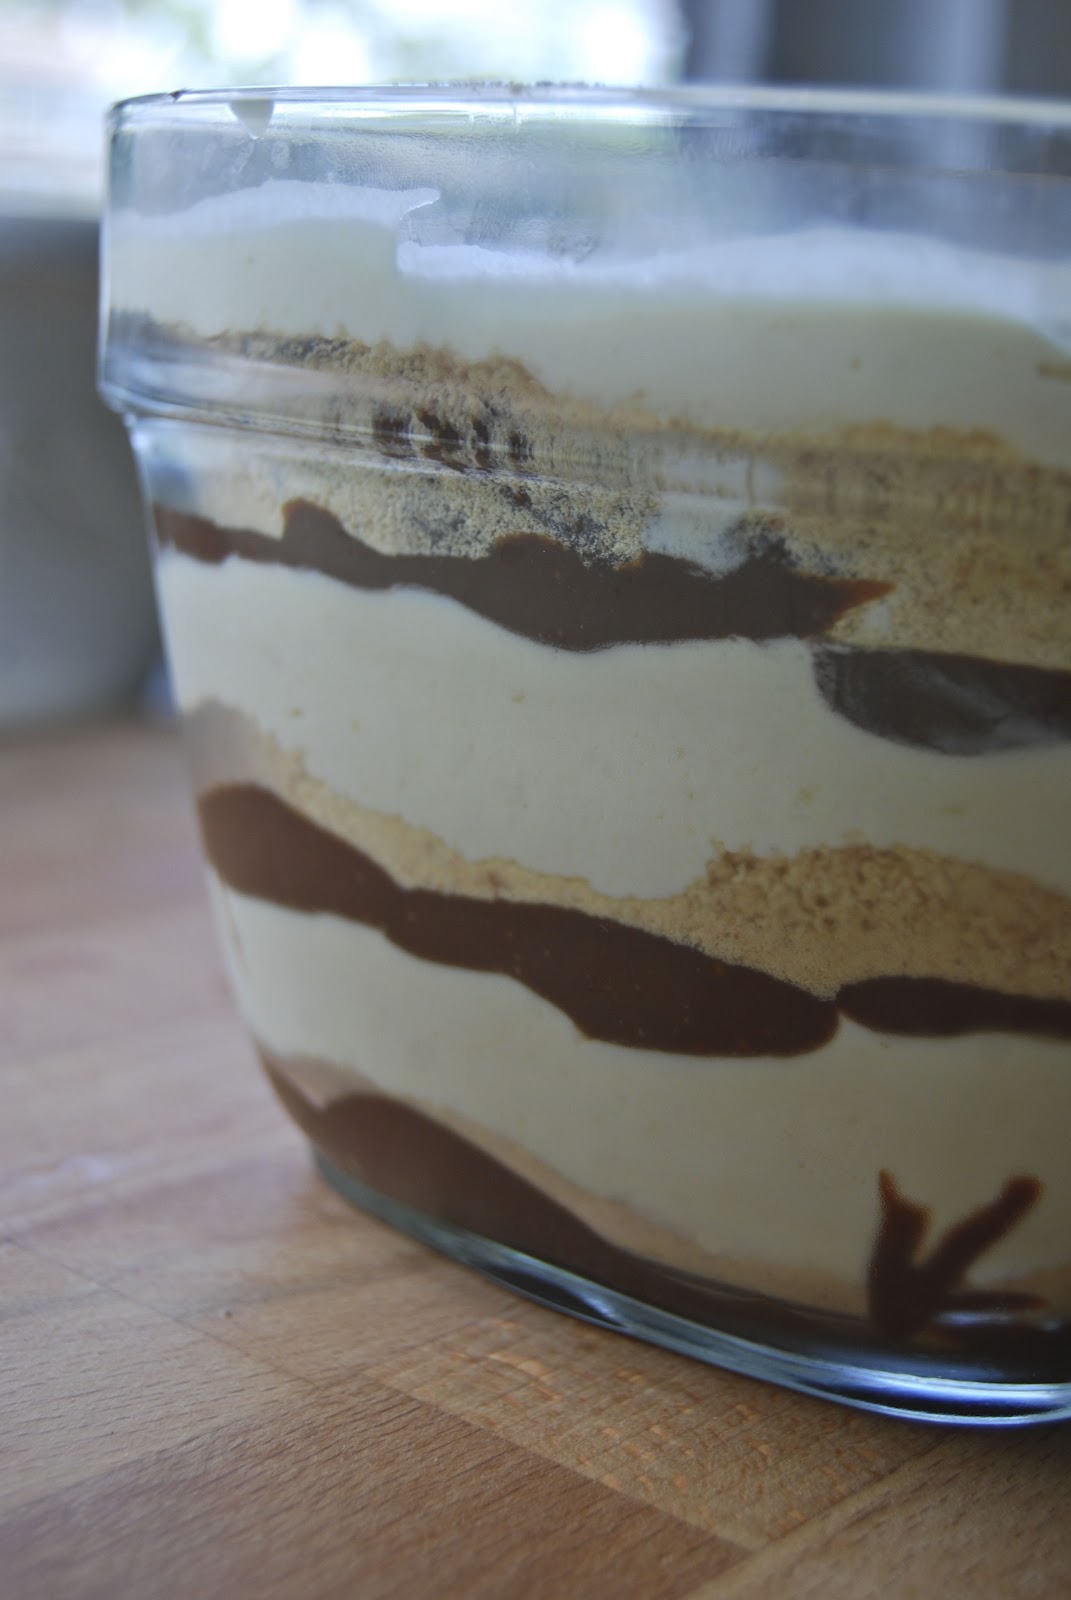
I'm a fan of Ben and Jerry's S'mores ice cream, but as much as I love it, it just doesn't taste like s'mores. Not really. To me the star of s'mores is not the chocolate (which is the dominant flavor of their chocolate based version), but the roasty, toasty marshmallow. In order to pay true homage, you just have to have toasted marshmallow ice cream. Don't worry, the chocolate and graham is there in force, but they are second and third fiddle, as they should be:) This ice cream is so good, you may have a problem getting it from the bowl into the freezer.

S'mores Ice Cream 
Toasted Marshmallow Ice Cream with Graham Cracker and Chocolate Fudge Swirls

Ingredients:
For the chocolate fudge:
1 c. sugar
2 Tbls. all purpose flour
1/3 c. cocoa powder
1 c. milk
For the base:
2 cups heavy cream
2/3 c. half and half
1/2 c. granulated sugar
1 10 oz bag of marshmallows
butter
1/2 c. graham cracker crumbs

Preparation:
Preheat broiler. Line a baking sheet with parchment paper and butter it well. Spread marshmallows in a single layer on the pan. Slide pan under the broiler and toast for about 2-3 minutes, or until tops are golden brown. Remove from the broiler and flip marshmallows with a buttered spatula. Return to the broiler for another minute to brown the other sides. Set aside to cool for a few minutes.

Transfer marshmallows to a blender. Add cream, half and half, and sugar. Blend on high speed until smooth. Transfer to the refrigerator to chill for an hour.

Set up your ice cream maker. Remove ice cream base from the fridge and whisk it until smooth (it may seize up a bit as it chills). Pour into the machine and process according to your instructions. (If you have a KA ice cream maker, it will take 15 minutes on the lowest setting.)

While the ice cream blends, make the chocolate fudge. Mix ingredients in a small sauce pan and bring to a boil over medium heat, whisking constantly. Boil until sauce begins to thicken. Remove from heat. Sauce will continue to thicken as it cools. Once the ice cream has finished processing, spread 1/4 cup of chocolate fudge in the bottom of a 1 quart container. Sprinkle with 1/3 of the graham crackers. Spread 1 third of the ice cream on top. Repeat layers, ending with ice cream on the top. Freeze for an hour or two to set before serving.


Thursday, July 19, 2012

Bean! Beans! The... oh, you get it.

Beans are awesome. Protein powerhouses so versatile and delicious that I could probably eat them is some form every day. The boy who was once a bean himself is confused by them. He loves them, he just doesn't know it. Give him a bean of any kind in its original form and he'll likely flick it across the room. Attempt to feed him a partially mushed bean and he will somehow swallow all but the skin, which he will then pull out of his mouth and flick across the room. Pureed food is not his bag anymore, but that's the only way he'll eat a bean. Luckily beans from a can are practically mush anyway, so a few additional ingredients makes for easy mealtimes. I fricking love black bean soup. I love making it from scratch with dried beans, but this way is just perfect for babies. Quick and easy, and you can adjust the seasonings of course. But really, this is a great way to introduce a little kick, so go for it!

Baby Black Bean Soup
Ingredients:
2 cans of black beans, drained and rinsed
1 quart chicken or veggie stock
1 small can of tomato paste
1/2 red pepper, chopped
1 tsp. cumin
1/2 tsp. red pepper flakes (optional, but why wimp out?)
salt and pepper to taste

Preparation:
Add beans, stock, tomato paste, and pepper to a sauce pan and bring to a boil. Add salt and pepper to taste, cumin, and red pepper flakes. Reduce heat to low and simmer, stirring occasionally, for 10-15 minutes. Remove from heat. Using an immersion blender or food processor, pulse a few times to crush most of the beans. If you have a wee little one, blend until smooth. Serve with a good dollop of whole fat Greek yogurt or some shredded cheese.


Friday, June 29, 2012

The Artist

 OK, not so much. But we did have a blast finger painting for the first time today! I made a batch of paints (one part flour to one part water with a few drops of food coloring) and gave Jude two little bowls so he could get a little texture and color play in before nap time today. I highly recommend it as long as you don't mind messes:) Yeah, it's definitely messy.

What is this stuff?

Ooh squishy!

And pretty!

And fun to smear!

And fun to fling.

The inevitable taste test.

Yummy? Not so much.

Bathtime!

Don't forget to save a bit of art for your memory books!

Thursday, June 28, 2012

Temper Temper (and a Giveaway!)

To all of you who downloaded my digital cookbook, Foodie Baby, thank you! If you haven't, what's stopping you? It's free for Pete's sake! The button is at the top right corner of this blog:)  If you did, I'd love to know what you think of it! You can leave a review on the book or comment here if you have suggestions.

***
My kid is going through a thing right now. A weird veggie thing. As in he won't eat any of them. Actually it isn't just veggies. Fruits, too! One day he'll house a bowl of blueberries, the next we throws them at me. He seemed to love sauteed summer squash, now he turns his nose up at it. Or yells at it while squeezing fits of fury. My mother claims it is because he's had so much yummy variety that he refuses to be bored by the same foods day after day. If that's true, I suppose it's all my own fault, trying to get this kid to be a foodie baby after all.

In the meantime I have had to get creative about including veggies in his diet. Any pureed veggie instantly becomes pasta sauce or quesadilla filling, which seems to do the trick. He also has a weird love for winter squash, even though it's out of season and not that good. But whatever, he's a bit young for the seasonal foods talk, so if he wants to eat acorn squash in June, so be it. Here's my new favorite way to make it. It's barely a recipe, and it's creamy and a bit sweet without adding butter or sugar. Love.

Roasted Acorn Squash with Coconut
Ingredients:
1 small acorn squash
1 heaping tablespoon coconut oil
salt and pepper (optional)

Preparation:
Preheat oven to 400 degrees. Slice the squash into quarters and remove seeds. Spray or brush lightly with olive oil and bake for 35-45 minutes or until fork tender. Scoop flesh into a bowl (or a blender if you are preparing this for a littler baby than mine!) and mash with the coconut oil. Season with salt and pepper if desired.

Don't have any coconut oil at home? Not to worry! You can win some! Yup, who doesn't love a giveaway? Tropical Traditions has a huge quart sized jar of Gold Label Virgin Coconut Oil for me to give to one of you lucky lovelies. They sent me a jar and the stuff is incredible. I love coconut oil. Delicious, organic, versatile, and I can't wait to whip up some hair tonic with it, too! 


To enter, sign up for the Tropical Traditions Newsletter and then leave me a comment. I will choose one winner at random by midnight EST on July 8th. Don't forget to leave me an email address to contact you if you win.


Want more than one entry? You can earn an extra for:
1. Following this blog publicly via Google Friend Connect
2. Liking Jojobean Designs on Facebook
3. Following me on Twitter and tweeting this giveaway
4. Follow on Twitter @troptraditions and @ttspecialdeals
5.   “Like” Tropical Traditions on Facebook (Please no, “I was sent by…” posts or posting a link to your blog, they will be removed
6.  Follow on Pinterest http://pinterest.com/troptraditions/
7.  Follow on Google + https://plus.google.com/117521286213187663525
8. Find Giveaways and Deals! http://ttspecialdeals.com and http://freecoconutoil.com


Just leave me a comment for each thing you do so I can keep track. I have perma-baby-brain.
Good Luck!

*Disclaimer: Tropical Traditions provided me with a free sample of this product to review, and I was under no obligation to review it if I so chose.  Nor was I under any obligation to write a positive review or sponsor a product giveaway in return for the free product.

Gold Label Virgin Coconut Oil - 32 oz.Win 1 quart of Gold Label Virgin Coconut Oil!
Tropical Traditions is America’s source for coconut oil. Their Gold Label Virgin Coconut Oil is hand crafted in small batches by family producers, and it is the highest quality coconut oil they offer. You can read more about how virgin coconut oil is different from other coconut oils on their website: What is Virgin Coconut Oil?

Tropical Traditions also carries other varieties of affordable high quality coconut oil. Visit their website to check on current sales, to learn about the many uses of coconut oil, and to read about all the advantages of buying coconut oil online. Since the FDA does not want us to discuss the health benefits of coconut oil on a page where it is being sold or given away, here is the best website to read about the health benefits of coconut oil.

Thursday, June 21, 2012

Foodie Baby, The Cookbook!

Are you a BakeSpace member yet? If you aren't, I have no idea what's stopping you. I've been using BakeSpace to catalog my recipes for ages, and was once a total sucker for chatting it up about flour substitutions, wine reviews, Velveeta cheese and other high brow food issues with fellow members. Sadly my time is shorter nowadays, so my chatting is limited to occasional flybys. But I did find a whole hour this week to do something I've been dying to do.  I published a digital cookbook! Foodie Baby is now available for download, for free!


Yup. BakeSpace now has an amazing feature called Cookbook Cafe that allows you to organize your recipes and photos into a digital cookbook. You can choose to sell it, use it to raise money for a charity group, or just offer it for free. Your pals can download it online or on their iPads:) The app is awesome for those of you with iPads, but the online version is just as fun! Here's a sneak peek of how some of the app features look: 

Check me out! Right next to Annette Starbuck from Cupcake Wars! She's so cute :) 

This is how a recipe appears in Cooking Mode. I love how everything is lined up with
highlighted steps as you go!  You can't forget a step that way:) Take that, baby brain!


Even if you don't have a baby, you'll want this Stovetop Mac and Cheese recipe. Trust me. I couldn't get Jude to keep his little paws off even though he just finished eating a bowl. Piglet. 


Now what are you waiting for? Go download Foodie Baby! It's free! Feel free to Pin, Tweet and Share away to show some love:)  http://www.bakespace.com/cookbooks/detail/Foodie-Baby/295/ 

Wednesday, June 20, 2012

So Very Berry

I'm so excited for summer. I can't even stand it. We have so many incredible new things going on at once that I think my head may explode! We're in the middle of buying a new house, I'm getting ready for my first ever craft show, opening an in home day care, and today was my last day of work. Like, the last day ever, of a job I've held for 2.5 years. So freaking psyched about it all that I had to bake to celebrate. Usually celebrations call for chocolate, but E is travelling and I won't let Jude have chocolate or sugar yet for fear of creating a mini junkie. Thus, I went the healthy route and created these no-sugar, whole grain baby cakes. A full serving of whole grain and fruit in each little cake. Plus they are cute! I baked mine in a mini bundt, mostly because I like to say bundt, but you can use a muffin tin!


Cherry Berry Baby Cakes
Ingredients:
3/4 c. white whole wheat flour
3/4 c. spelt flour (you can substitute soy, chick pea, millet flour, anything you like!)
1/2 Tbls. baking powder
1/8 tsp. kosher salt
1 beaten egg
1/2 c. grape juice concentrate
1/4 c. vegetable oil
1/2 c. soy milk
3/4 c. blueberries, divided
1/2 c. pitted cherries

Preparation:
Preheat oven to 350 degrees and grease a muffin tin. In a food processor, pulse cherries and 1/2 c. of blueberries until almost smooth. Set aside.
Sift together dry ingredients in a large bowl. Add wet ingredients and blend until well combined. Gently fold in remaining 1/4 cup of whole blueberries and 1/4 c. of the puree, just until the fruit is swirled through the batter. Divide evenly among twelve muffin cups and bake 15 - 20 minutes or until tops are golden. Allow to cool for a few minutes in the pan before inverting.

* Use the leftover puree to top Greek yogurt, whole wheat pancakes, or to replace jam in a PB&J!

Thursday, May 17, 2012

Hippie Mayo


I'm a Miracle Whip girl. I married a Mayonnaise guy. I have no idea what will happen with Jude. Except that so far I won't feed him either one. I read the ingredients for the first time on the back of the jar of MW and decided he wouldn't get to taste it. Enzyme modified egg yolks didn't sound all that yummy to me. But then neither did whipping up some raw egg yolks to make real mayo for my little man.

I decided to make some soy mayo using a recipe I found in an old recipe collection my boss got when she did Outward Bound in the 70's. Hand typed, thread bound, and full of gritty vegetarian and vegan fare that would make a hippie proud. I made a few adjustments for Jude, and was actually pretty impressed with the outcome. I quartered the recipe and it was still enough for his portion and a big bowl for me. Once you make your baby's salad, feel free to add a bit of spicy dijon mustard or more vinegar to your own. It's awesome on a bed of greens with some walnuts and dried cherries!


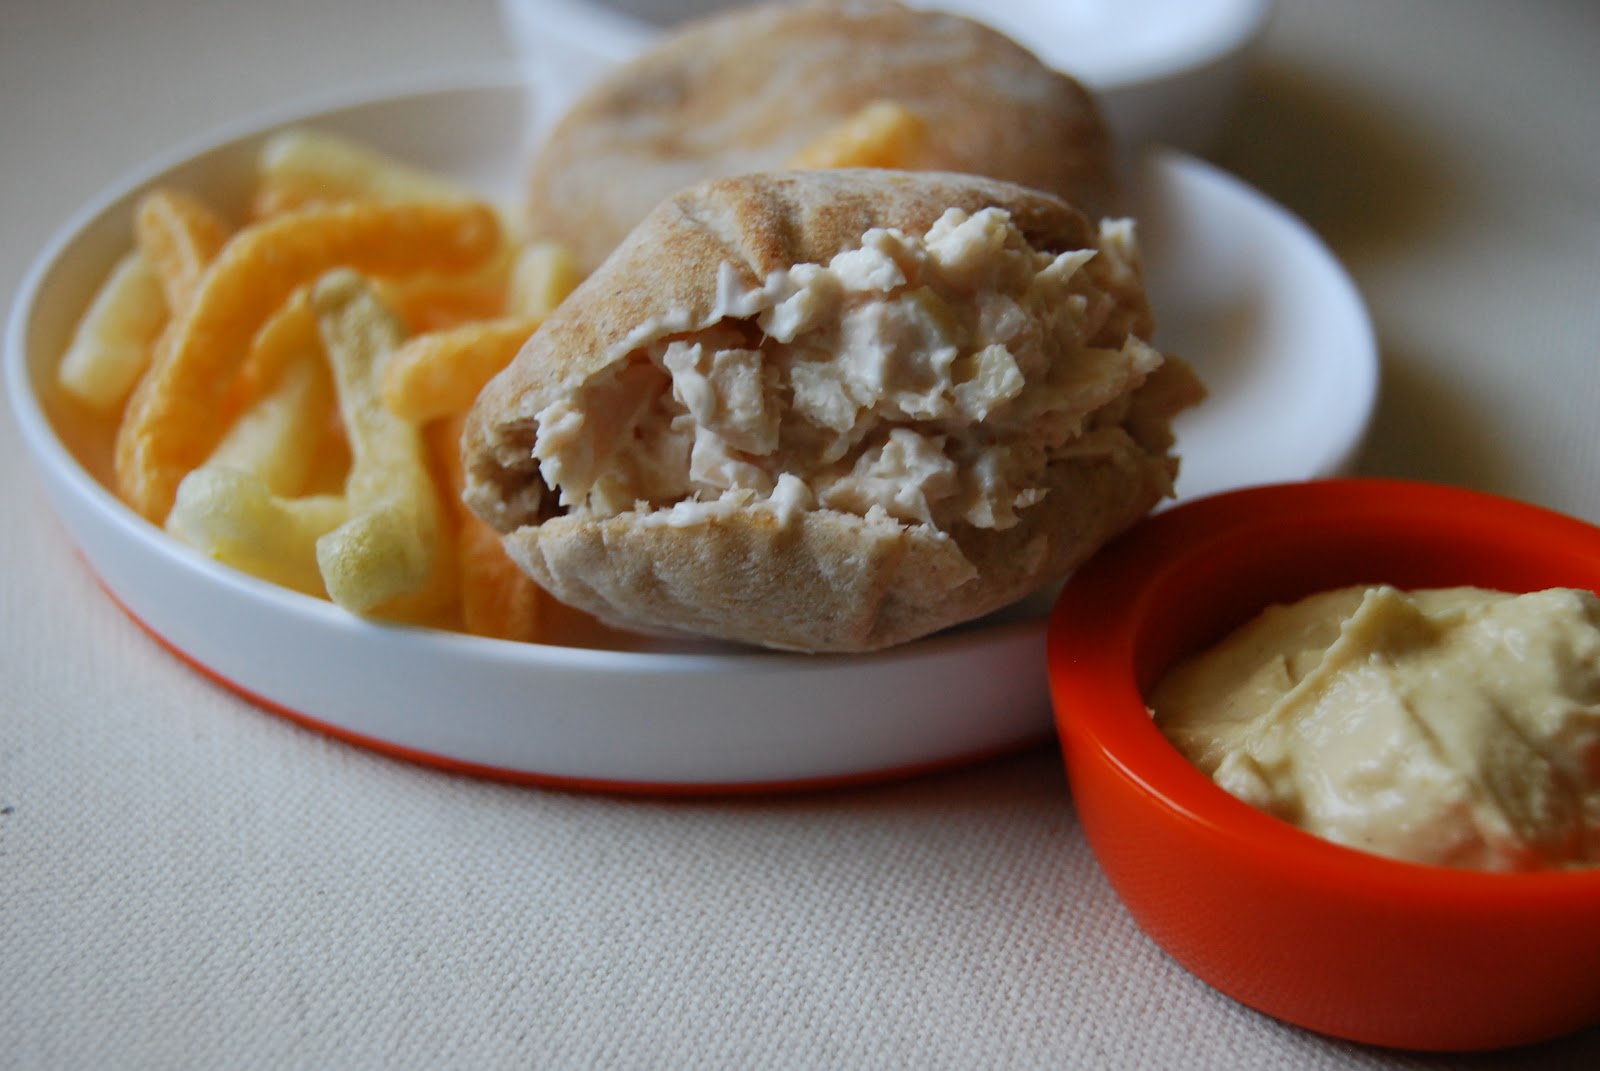
Baby Chicken Salad with Soy Mayo
Ingredients:
1 cup cooked chicken, chopped finely
1/4 c. cold soy milk
1/2 c. oil
2-3 tsp. white wine vinegar
dash of hot sauce
1/4 tsp. dry mustard
1/4 tsp. garlic powder
salt and pepper to taste

Preparation:
Pour soy milk into a blender. With the top off and the blender set on medium speed, pour oil into the blender in a very thin stream. Mixture will thicken to the consistency of whipped cream. Turn off the blender and stir in remaining ingredients. In a bowl, add a few tablespoons of mayo to the chicken and toss to coat.

Serving Ideas:
Stuff into a whole wheat pita or bread.
Serve over rice or cold pasta with yogurt.
Add finely chopped veggies or a little vegetable puree to make this a full meal. Jude likes his with beets!

Wednesday, May 16, 2012

Snort

Jude's favorite animal is a pig. He carries his tiny Little People pig all around the house and snorts enthusiastically. He snorts so much that I worry about his nasal passages. He will do it on command, like when you ask, "What sound does a pig make?" He will also do it random. Or at moments that border on the embarrassing, if they weren't so perfect. Like when an obnoxious lady at Target got all up in his grill in the carriage and shouted at him that he was "SOOO daaarling!" 
"SNORT!" She gave him a funny face, but I think his message was loud and clear. 

I wonder if he'll continue eating pork, once he eventually learns it comes from a pig. How do you teach kids about things like that? Take them to a farm to pet animals and then tell them how tasty they are? Traumatizing much? I guess I'll face that hurdle when I get to it in a few years. In the mean time, I'll continue prepping recipes that can be eaten by all of us, even if it's from a cute little pig.

Pulled Pork with Couscous
Ingredients:
2 lb. boneless pork roast
2 apples, peeled and cored
1 onion, diced
2 cloves garlic, minced
14 oz can diced tomatoes, with juice
3 tablespoons apple cider vinegar
1 1/2 ounces molasses
2 teaspoons paprika
1/8 teaspoon cayenne pepper
1 teaspoon chili powder
3-4 Tbls. water
1 cup couscous
1/4 c. golden raisins

Preparation:
Place pork apples and onion in slow cooker. Whisk together remaining ingredients and pour over the pork. Cook on low for 6 hours, or on high for three. Remove pork from the slow cooker and shred, return to the pot. Remove apples and cut into chunks.

Place couscous and raisins in a bowl. Boil 1 cup of water and pour over couscous. Let sit for five minutes and then fluff with a fork. Spoon a portion into a bowl for baby. Add some apple, pork and sauce. 

*NOTE: Pork is wicked hard to chew. Jude has a lot of teeth, but without molars, chewing pork is like chewing bubble gum. He looks like a little cow. After shredding the pork, I set aside a portion for him on a cutting board and run the big knife through it a bunch of times until it is well chopped. Problem solved.

Also, here's an updated menu sample for you:) How things have changed since I made the last one!
Jude's Sample Menu - 12 Months


Monday, May 14, 2012

Going Nuts

Deciding that your baby is ready to eat nuts can make you nuts. Ask your own mom and she'll likely give you a quizzical stare (did you know anyone with a fatal nut allergy as a kid? I didn't.). Ask your pediatrician and they may say anything between 9 months to 36 months. Ask your friends and you'll get the same vague answers. Don't even think about searching online because the range there will just make you more dizzy. Personally, I take every warning I hear with a grain of salt, weigh my options, and do whatever I want. I'm lucky to have a child with no known food allergies, who has yet to ever have a big reaction to anything (knock on wood!). Nuts and seeds are such little protein powerhouses that I can't think of any reason not to include them in his diet. If you are ready to give nuts to your little, this recipe is perfect for a snack that includes protein and fruit, and it's delicious. It's actually like Baby Crack. If you aren't ready, bookmark this one for later, because it'll be a huge hit.

I made these based on the fact that I'm obsessed with Lara bars and have meant to make my own for ages. The name is a bit deceiving, because they actually don't include peanut butter. They taste like they do, though!

Peanut Butter and Jelly Baby Truffles

10 oz. pitted dried dates
1/2 cup dried strawberries
1/4 cup cashews
1/4 cup sunflower seeds

Place everything in a food processor and pulse until a ball forms. Using a one inch cookie scoop (or fine, use a spoon) scoop into balls and roll in your palms. Place on a cookie sheet lined with parchment and chill for an hour. Then you can transfer them to a container without them sticking to each other and store in the fridge for up to a week. Freeze them if you won't eat them that fast. Depending on how many teeth your kiddo has, you may want to let them come to room temperature before serving!

Variations:
Substitute almonds for the cashews and apricots for the strawberries. That's my favorite:)
You can also use raisins, cranberries, prunes, dried pineapple with coconut... Let me know if you come up with any yummy flavor combos! 

Sunday, May 06, 2012

Slacker Cake

Good Lord, I'm a slacker lately! The last time I waited a month between posts was when Jude was born. I have at least half a dozen baby food recipes sitting in a pile to be blogged, but haven't gotten around to it, yet. I have a pile of shop updates to do, but I haven't gotten around to that either. I think I've just been having too much fun with my kiddo and the shop to blog lately, and I'm not going to feel bad about it. If you want a shop update, you can pop over and visit:) If you want some new recipes, I swear I will get to them! Or email me, and I'll send you some:) If you want to bake a little monster cake, here you go! You'll need this ridiculous Big Top silicone cupcake mold for the shaped cake. Or get crafty and see what else you can come up with!

Jude's Monster Mash Birthday Cake


Ingredients:
1 2/3 cups whole wheat flour
1 2/3 cups all purpose flour
3/4 c. brown sugar
1 cup water
1 cup unsweetened applesauce
2 tsp. baking soda
1 tsp. salt
2 tsp. cinnamon
1/2 tsp. nutmeg
1/2 tsp. allspice
2/3 cup vegetable oil
2 tsp. white vinegar
For decorating:
1/2 cup powdered sugar
8 oz. cream cheese at room temperature
1 cup shredded carrots
White and dark chocolate melts

Preparation:
Preheat oven to 350 degrees. Sift together dry ingredients. Fold in wet ingredients until well combined. Pour into a well greased pair of cake pans or a 9x13 inch glass baking dish if you are not using the Big Top cupcake mold for the monster shaped cake). Bake 30 minutes or until a tester inserted in the center comes out clean. If you are making a monster, you'll want to bake it longer and keep checking every ten minutes or so, the top took at least 40 minutes and the bottom almost an hour! Allow to cool for ten minutes before inverting out of the pan to cool completly on a wire rack.

To create your monster:
Draw your monster arms, horns, mouth and eye onto a sheet of paper. Top with a sheet of wax paper. Melt candy melts according to the package instructions and pour into a squeeze bottle. Draw your monster parts according to the pattern you made and let them harden for at least an hour. Don't stick them in the fridge or they get all dewy! 
Beat powdered sugar into cream cheese. You may need to trim the top and bottom of your cupcake halves to make them flat. A serrated bread knife does this nicely. Smear a bit of frosting onto the top of the cupcake base and top with the em, top, duh. Frost with most of your icing, leaving a few tablespoons for just in case. Press the monster parts into your cake and secure with extra icing if needed. Press carrots into the icing to create fur. And done.

Good luck getting your kiddo to eat it. Mine just pulled off the carrots to snack on, so I ended up eating it all! How did I have a child with no sweet tooth!


Thursday, March 29, 2012

Happy Birthday, Jude!

Last Saturday our little man turned one. I still have to pinch myself. It's insane that the past year has flown by this fast, that he is this close to walking and really talking and spoon feeding himself and on and on into toddler-hood. I'm so not ready to have a toddler! Egad! But there it is. And so we had to celebrate with the familia in Little Rhody at least for the big One. We kept it casual and didn't go too crazy, though I was tempted. I have been so busy with the shop lately (yay!), that I had to keep the handicrafts under control. It was hard, but I handled it. In the end I only made salads, cupcakes, pom poms, a mini cake, and some monster crafts. Oh, and invitations, but those don't count :) And now for some photo overload...


 The mini cake, made with my Aunt's Applesauce Cake Recipe tweaked for babykins. 
I'll do a recipe post pretty soon :)


Rocking his Maddie Bugs tee which I somehow don't have a full photo of!?


I don't think he liked our singing.


And he definitely didn't trust the cake.


 He ate two bites.


 Then he wanted to go play.


 And who could blame him when there's a bubble mower to push!


The last Picky Sticky. 
*le sigh* 
Happy Birthday, Jude!
Love, Your Mama

Monday, March 05, 2012

Beans and Greens and Bitchiness

It finally happened.

About a week ago I was in line with Jude at the grocery store behind a woman writing personal checks to pay for three separate orders. It was almost lunch time, so Jude was done with his toys and sitting in a cart. In order to keep the peace, I grabbed a container of Gerber puffs from the aisle behind me and poured him a big handful. "You're lucky," I told him, "You never get to have these!"

The woman paused and looked at me. "Why not?" she asked.

"Well," I replied, "I make most of his food."

She raised her eyebrows, "Oh, you're that kind of mom."

That kind of mom? Excuse me? Homegirl was lucky I was in a nice kind of mood or I would have said something along the lines of: "You mean the kind of mom who enjoys cooking? The kind who wants to know what's going into her baby's mouth? So maybe your kids were raised on blue box mac and cheese, and they grew up fine. That's great. So did my husband. So did I. But if you want to be all Judgy Judy let's start with that dye job. 1982 called and it wants its roots back."

Of course I didn't say any of that. But I was pissed. What is it about having children that makes people feel the right to pass out unsolicited advice or criticism? I was spared that when pregnant with Jude. Amazingly no one tried to touch my belly or asked if I was taking my pre-natals. Maybe it was the "Don't friggin touch me," look plastered on my face. Whatever it was, it has passed. Because obviously this woman felt the need to say something judgmental and nasty to me. Next time I'll be ready.

I went home and cooked. Another meal that works well for us and the babe. It's vegan and gluten free, too, in case you, like so many of my friends now, have dietary restrictions. Or babies with dietary restrictions. The only thing I can't figure out is how to lose the onions (sorry Jess!).


Garlicky Beans and Greens
Adapted from Bob's Red Mill
Ingredients:
3 cups cooked cranberry beans (canned cannelini or kidney beans are also fine!)
4 cups vegetable stock
1 large onion, chopped
1 large carrot, peeled and chopped
3 cloves garlic, minced
1 lb. kale, chopped
1 small can tomato paste
2 tsp. cumin
2 tsp. salt
1 tsp. black pepper
1-2 tsp. red pepper flakes, depending on your taste
1/2 cup cornmeal
1/4 cup water
juice of one lemon

Preparation:
In a large dutch oven, combine all but the last three ingredients. Bring to a boil and reduce heat to a simmer. Cook until kale is tender, about 8-10 minutes. In a bowl, whisk cornmeal into water and lemon juice. Stir slowly into the pot and continue to simmer until thickened, about 15 minutes. Serve with crusty bread if you wish.

Adaptations for Young Babies:
Guess what, your baby can totally eat this. At about 7 months it's safe to introduce leafy greens and garlic, so go for it! You may want to do a few adaptations to reduce the amount of spices if your baby has yet to try them until you know he likes it.

Just start with the first five ingredients (beans through kale)  in the pot and simmer until tender. Puree as much as baby will eat and set it aside. Then you can add the tomato paste and seasonings to the pot and simmer for five minutes before adding the cornmeal mixture. That way you can still enjoy the full flavor of the meal and your baby can get a taste, too. Jude loves this. He's bean eating variations of greens and beans for months and it is one of my favorite go-to combos now!

Thursday, March 01, 2012

Winner Winner Chicken Dinner

Is it seriously March already? March used to be my least favorite month of the year. It's the longest month for teachers because there isn't any single day off. I know all of you with regular 9 to 5's are all, "Whaaa whaaa! Shut up about the easy teacher schedule!" but really! Kids get totally insane by the end of March and it totally drives you to drink. But not on the job or anything. Honestly, what do you take me for?

This year March is a bittersweet month. In 24 days the Boy Who Was Once the Bean will turn one year old. I can't even stand it. I'm planning a menu and picking out clothes and decorations and making favors. All while trying to ignore the fact that Jude is quickly becoming a toddler and not a baby. Thank God he isn't walking yet! He's eating me out of house and home already.

I'm getting more and more into the habit of feeding Jude whatever E and I eat for dinner. At least sometimes. He's not quite ready for buffalo calamari. Until then, I try to make at least two meals a week that I can adjust for him and freeze for later. Chicken soup is by far the easiest. You can use a rotisserie chicken and low sodium boxed stock if you're in a pinch. Last week I roasted a chicken, then made a huge pot of stock from the bones so I could fill up the freezer. After the stock finished cooking I just tossed all of the ingredients in for this soup, but I always have this stuff on hand in a pinch. Chicken soup doesn't have to take an hour, people. I'm not about to waste a nap making soup.

Quick Baby's Chicken Rice Soup
Ingredients:
4 quarts chicken stock
3 cups cooked, shredded chicken
1 1/2 cups cooked brown rice
2 large carrots, peeled and chopped
3 stalks of celery, chopped
1 large onion, chopped
2 cloves garlic, minced
salt and pepper to taste
olive oil
1 Tbls. fresh chopped oregano and parsley, optional

Preparation:
Heat a little olive oil in a large pot. Add onions and carrots and saute two to three minutes. Add garlic and saute until fragrant, about 1 minute. Add celery, chicken, herbs if using, and stock and bring to a boil. Reduce heat to simmer and cook until veggies are tender, about 7 minutes. Ladle soup into a blender of food processor and add some rice (it should be about 1 part broth, 1 part solids, 1 part rice. Very scientific.) Blend until smooth. Add more rice or broth as you need to get the desired consistency. Freeze whatever you don't serve in ice cube trays or store in the fridge for up to three days.

*To serve the rest of your soup to the big people, season with salt and pepper and add the rice to the pot to heat through.

Sunday, February 12, 2012

Sweet Hearts

So yeah, Valentine's Day. Usually I get all into cooking up something fabulous for E and I to eat for a nice little romantic dinner. This year Valentine's Day falls on a Tuesday, though, and my days are obviously scheduled around another little person's needs. I have no idea if a fabulous feast will materialize. Sweets, on the other hand, there will be. I've got my eye on a couple of  dessert recipes from Momofuku Milk Bar, though. Things I can do a few steps at a time over a day or so. Crack Pie, anyone? My Pinterest Dessert board is also full of goodies to try, so who knows what I'll end up with.

In the meantime, I am chipping away at the pantry stash because I realized it's just ridiculous in there. A whole family of raccoons could move in and I'd never find them. So a box of Cheerios and a bag of marshmallows were sacrificed for this early sweet heart treat. Yummy! I love a ten minute no bake dessert/snack/excusetobingeonsweets. Don't you?


Dark Chocolate Peppermint Cereal Bars
Ingredients:
3/4 cup dark chocolate chips
1 10 oz. bag peppermint marshmallows (if you can't find them, use regular mini marshmallows and add 2 tsps. of peppermint extract)
4 Tbls. butter
4 cups of Cheerios (or Rise Krispies or Chex or whatever you like)
pinch of salt
1/2 cup white chocolate chips, optional
Nonpareils, optional

Preparation:
Butter a casserole dish and line it with parchment paper. (Note: For thick bars, use a 9 x 9 inch pan, for thin bars use a 9 x 13. I use a 9 x 13 so I can use cookie cutters.) Measure out cereal and 1/2 cup of the marshmallows into a bowl, set aside. In a saucepan over medium high heat, melt butter and chocolate, stirring until smooth. Add marshmallows and stir constantly until melted. Add cereal and reserved marshmallows and fold until combined. Pour into prepared pan and smooth with the back of your spoon. Refrigerate for 3 - 4 hours or until firm. Cut into shapes with cookie cutters or slice into bars. If desired, melt white chocolate over a double boiler and drizzle over bars. Sprinkle with nonpareils.

Thursday, February 09, 2012

Nibbles

Feeding a growing boy gets really interesting once he decides to be independent and feed himself. Get ready for prunes smeared in the hair and far flung bits of Cheerio to appear in random places days later. I just happened to discover some crusty green stuff on the back of a dining room chair leg the other day. It took a butter knife to scrape it off and I have no idea what it was. Nice. One of the ways to avoid a little of the mess and to allow your little to still explore the fun of self feeding is combo finger foods. Jude had issues with finger foods at first, in that all he could pick up were Cheerios and puffs. Banana chunks slipped right from his fingers like a bar of wet soap. Even when rolled in baby cereal. Any cooked fruit or veggie shot right out of his hands. It was sad to watch, really. He'd try so hard to pick up a bite, only to have it escape him inches from his mouth. And a kid can't live on baby puffs, even if they are fun to stick to his forehead.

I started making Jude fruit and veggie bites so he'd be able to feed himself something nutritious that he could actually hang on to. Now they are his favorite snacks. E sneaks them, too. They're delicious, honestly. I make a couple of different variations, and now I actually make them double sized. He houses them, even if I still have to break them into a few pieces. We're still working on the "take a bite" idea. They obviously defrost faster when small, so make whatever is most convenient for you and your babykins.

Carrot Apple Cheddar Bites
makes 2 dozen

Ingredients:
1 cup shredded carrot
1 cup shredded apple
1 cup shredded chaddar cheese
4 egg yolks
1-1 1/2 cups of whole wheat flour, bread crumbs, or baby cereal (I use Earth's Best Rice Cereal)

Preparation:
Preheat your oven to 350 degrees. Line two cookie sheets with parchment paper. Toss all ingredients in a bowl and stir until well combined. Using a cookie scoop, scoop out the mixture and press it firmly into the scoop. You can also use a tablespoon and roll into balls with your hands. Place a few inches apart on cookie sheets. Bake for 15 - 20 minutes or until set and just beginning to brown at the edges.
Store a few bites in the fridge for up to three days. Freeze the remaining bites in ziploc bags for up to a month.

Variations:
Zucchini Ricotta Bites - Substitute 2 cups of shredded zucchini for the carrot and apple. Add 1/2 cup ricotta and increase dry ingredients by 1/4 cup.

Sweet Potato and Pear Bites - Substitute 1 cup shredded sweet potato and 1 cup shredded pear (use a firm pear like Bosc) for the carrot and apple.

If you come up with a new flavor combo that your baby loves, let me know!

Thursday, February 02, 2012

Cake Pop FAIL!

Erg. Cake Pops. Those adorable little sweet treats on a stick that everyone and their mother appears to be making with ease these days. I mean, you can get them at Starbucks for Pete's sake (although they aren't good. Not at all.). Apparently, I am not everyone, nor am I their mothers. The joy of cake popery eludes me. I had grand ideas of sending of a batch of pretty little sweet pops to my nephews and cousins for their annual Valentine's Day goody boxes, but no. Not this time. Despite the creation of a delicious cake recipe and three different dipping attempts, I failed to get even a single perfect pop.

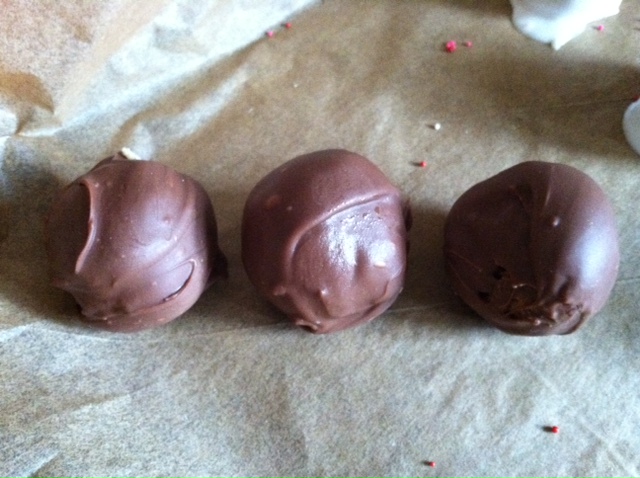
It's the coating. I started with Wilton brand candy melts in light cocoa. Is it me, or does this stuff just suck? It melts into a very thick chocolate-like substance ( I say "chocolate-like" because one glance at the ingredients list and you'll shiver) that is no good for dipping. Squeezing and spreading, maybe, but not dipping. I was going for a thin, glossy coat, but I got thick and gloppy instead. Clearly this isn't the product I need.

I then tried a white bark found at the grocery store. I don't even want to go there. It didn't even melt. It turned into stringy, cheese-like strands of white sugar and ended up in the trash. So I went with the last resort. I knew the frosting I used for the cake wouldn't work, but I had a can of white frosting (for shame!) in the back of the pantry. A zap in the microwave and it was melted into a smooth glaze. It actually looked like it might work. For a hot minute. Then I realized that it was still too heavy, as my poor pops went tumbling ass over tea kettle off of their sticks. They never stood a chance. Sigh.

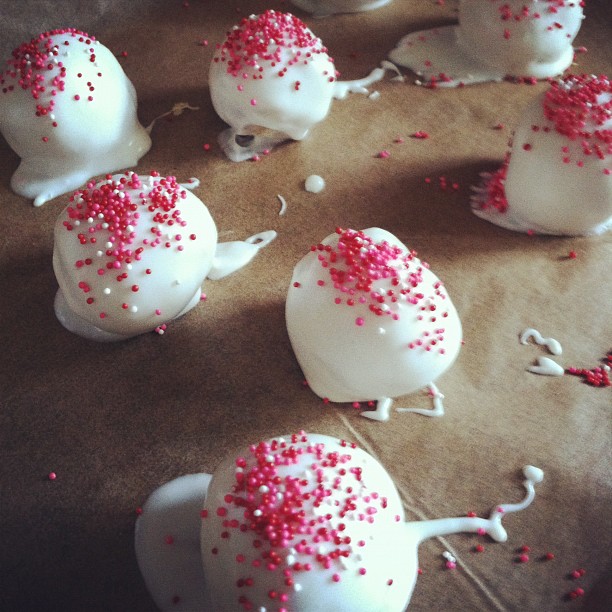
So I ended up dumping all of the cakes into the melted frosting and pulling them out with a fork. Cake balls. A sprinkle of nonpareils and they went back to the fridge to set up. Not that they ever really set up. They are still sticky and gooey. But I refuse to cave in to the perfectionista breathing down my neck right now. That would be a whole two days worth of nap time down the drain. So I'm going to eat every single one of those little blobs if it kills me. Or causes me to slip into a sugar coma. That'll show 'em.

Raspberry Cream Cheese Swirl Cake Balls
Ingredients:
One white cake baked in a sheet pan
2 sticks butter at room temperature
12 ounces of cream cheese at room temperature
1 tsp. vanilla 
2 1/2 cups powdered sugar

6 oz. seedless raspberry jam


Preparation: Beat butter and cream cheese with vanilla until fluffy. Add sugar 1/2 cup at a time, beating at medium high speed until very fluffy. You may not need all of the sugar! Set aside one cup of frosting and reserve the rest for another use.


Crumble the cake into small crumbs in a large bowl. Add frosting and fold until just combined. Heat jam in the microwave or on the stovetop, stirring until smooth. Pour into cake mixture and fold until just combined so that swirls of jam still appear.


You may want to butter your hands at this point since it's a messy job! Scoop cake balls into your palm using a one inch batter scoop. Roll into a smooth ball and place on a cookie sheet lined with parchment. Repeat until all of the balls are formed. Move sheet to the freezer for at least an hour. 


***


Now on to that dipping mess. I clearly can't help you there. Bakerella can show you how, or maybe you have tips for me? A different brand or product I should use? Or maybe I should just hang my head in shame and move on? Hit me up if you have ideas!

Monday, January 30, 2012

Are you ready?

For some "friggin' a we made the Superbowl again" football?

Or some "oh, ok, some other team made it, but I love a good game" football?

Or a "Who cares about football, I just want to see Madonna" football?

Honestly, if the Pats weren't playing, I'd only be tuning in for a few commercials. Sleep is much too precious these days. That said, the Pats are playing *happy dance* and though E and I are happily housebound due to a certain little man, we will be hosting our own Superbowl party for two. Even without a long guest list, a big sandwich, and an ice luge, we will have good food and beer. I'm all for calorie laden gorge-fests sometimes, but I figure lightening up a few things doesn't hurt either. If you're looking for a healthy option to serve guests that can be made in advance, takes very little time or work, and is frickin' delicious, this recipe is perfect. You can keep it warm in a crock pot and let guests serve themselves while they scream at the TV. Just make sure you leave out a stack of napkins, 'cause these buggers are saucy!

Turkey Veggie Sloppy Joe Sliders
adapted from Bon Appetit, September 1999
Ingredients:
1 lb. ground turkey
3 cloves garlic, minced
1 medium onion, chopped
1/2 cup chopped red bell pepper
1/2 cup chopped green bell pepper
1/2 cup corn
3 Tbls. chili powder
2 Tbls. tomato paste
2 Tbls. Worcestershire sauce
3/4 cup ketchup
1 bottle of dark beer
olive oil
salt and pepper
Whole Wheat slider buns (Martin's makes a yummy potato version!)

Preparation:
Heat a little olive oil in a large pan over medium high heat. Add turkey and cook until well browned, crumbled with a wooden spoon. Add onion, bell pepper, and garlic and cook until veggies are tender. Add chili powder and tomato paste and cook a few minutes, stirring constantly. Add ketchup and beer and cook, stirring until foam subsides. Redeuce heat to a simmer and cook for 15 minutes until sauce reduces. Season with salt and pepper, add corn and cook until heated through. Serve on slider buns.


Crossing my fingers that I get to see this face one more time! Swoon.


Don't forget to enter my giveaway for a $25 Gift Certificate to the Shop!
You'll still get your Valentines in time for the 14th!