Tuesday, April 13, 2010

It's about time...

... that I feature some real food! Something that isn't bread, or a brownie, or even a soup. An actual meal, for the love of Pete! I know, I know. I realize that most of my posts have been carb-loaded-sugar-filled-fatty-frenzies lately, due in part to the Easter holiday and also to the fact that I'm baking my way through a bread book. I've been exercising a lot of it off, but I very well may have to put on a bikini in two weeks, so we are in full fledged health mode in this house until then. Thank God for Mark Bittman.

After all of the votes were counted and Mark Bittman beat out Bobby Flay as the new I Heart Cooking Clubs Chef, I did a little jump for joy, rhetorically speaking. I'm not that weird. I kind of hate Bobby Flay. And I kind of heart Mark Bittman thanks to his many Today Show appearances. I marched off to the library to grab a few of his books and got to work on this week's challenge: Raiding the Pantry.

Now there's a challenge that is right up my alley. See, I have a problem. I am a food hoarder. This is my pantry. The shelves are 24" by 32" and there's another one up top that I couldn't fit in the photo. There are only two people living in this house, but when the zombie apocalypse strikes, even if it is only in my husband's head, we are ready. We could stay hidden in this place with enough food for at least 7 months, more if I carefully ration the oatmeal.

Flipping through the book How to Cook Everything: The Basics, there were honestly only a few recipes that really jumped out at me. It's a very basic book (hence the title, I'm a genius) and would make a great gift for a college kid who can't cook, but it's a tad elementary for me. That said, there is still some good eatin' in here, like the Cold Noodles with Sesame Sauce. With a few additions it made a perfect dinner! Make the noodles in advance and it's also super fast.

Orange Sesame Grilled Chicken with Cold Soba Noodles
For chicken:
Ingredients:
2 chicken breasts cut into strips
1 Tbls. sesame oil
1 Tbls. soy sauce
1 1/2 Tbls. rice wine vinegar
Juice and zest of one large navel orange
1 tsp. ground ginger

Preparation:
Place chicken in a ziploc bag or shallow dish.
Whisk remaining ingredients and pour over chicken. Marinate at least 3 hours or overnight. Cook on a preheated grill or grill pan for 3 or 4 minutes per side to cook through.

For noodles (everything but the scallions was from the pantry, woo!):
Ingredients:
12 oz. buckwheat soba noodles
1/2 cup tahini (or you can use peanut butter)
2 Tbls. sesame oil
1 Tbls. sugar
1/4 c. soy sauce (I use reduced sodium)
1 Tbls. rice wine vinegar (I use the Lite version)
1 tsp. Sriracha Hot Chili Sauce (we are so addicted to this stuff!)
salt and pepper
3 scallions, sliced thinly
1 Tbls. sesame seeds
Preparation:
Cook soba noodles in salted boiling water for 12 minutes, or until just tender. Drain, rinse with cold water and place in a large bowl. Toss with 1 Tbls. sesame oil and refrigerate.

Whisk tahini, sugar, soy sauce, vinegar, sriracha, and salt and pepper to taste until combined. Add a few Tbls. of hot water if it is too thick. You'll want it to be the consistency of heavy cream. You can refrigerate this also until ready to serve, but you'll need to thin it out again with more water! When you are ready to eat, toss noodles in tahini sauce and transfer to a plate. Sprinkle with scallions and sesame seeds and top with grilled chicken. Drizzle with remaining sesame oil.

This stuff was awesome, and guess what? E made most of it. Told you he can cook.

Print the Noodle Recipe


Print the Chicken Recipe

Wednesday, April 07, 2010

Moley, moley, moley!

This week's assignment for HBin5 has proven to be a challenging one. Our assignment is to mix up a full recipe of Gluten Free Olive Oil Dough (page 238-239 of Healthy Bread in Five Minutes a Day) and to then make 1 loaf of bread, a pizza, and a sesame baguette from the dough. This dough calls for soy flour, tapioca flour, and Xanthan Gum, which sparked a discussion about less costly and more readily available ingredients. That xanthum shit ain't cheap. I read along while a bunch of people started baking and subbing, and then complaining. Turns out this bread is a stank one, with a dough that smells unpleasant and a flavor to match. Not one person who has baked it thus far was very impressed. Therefore, I didn't make a gluten free bread. Blatant disregard for homework is not very me (maybe because I'm a teacher?), but I am not about to eat carbs that I don't even like. My metabolism isn't what it was. Since I decided to blow off this assignment, I went back in time to one I skipped in March: Avocado Guacamole Bread (pages 160-161).

Now, E and I adore avocados, and we especially love guacamole. I had some pretty high hopes for this dough. I made half a batch, spiked it with a rounded teaspoon of cayenne pepper, a teaspoon of cumin, lots of fresh cracked pepper, and a whole avocado instead of half. Then I shaped the dough into buns and sprinkled the tops generously with shredded taco cheese (you know, the seasoned cheddar blend you use on nachos and such). In the end they were pretty and I loved the flavor, but honestly, most of the bang comes from the cheese and cayenne. There is very little avocado or tomato flavor in the bread itself, which makes me think I should double both if I bake this again. I know some people used salsa in place of the tomato, and I think that would have been a good way to go. Ah well! Live and learn, then smear this baby with fresh avocado.

Stop by Michelle's blog and visit the Bread Braid to see the brave souls who actually made gluten free breads!

Tuesday, April 06, 2010

Nesting

I suppose it is a tad late for an Easter post, but let's just consider this a springtime in general post. I did make these little Bird's Nest macaroons for Easter, but they'd work just as well for any spring party, a baby shower, or Mother's Day. I love macaroons anytime; I even made them for our wedding. While, yes, they are on the sweet and rich side, it's all good if you only have a few!

I really wanted to put some of my very favorite Easter candies into my baking this year. You see, I'm a huge sucker for Cadbury Mini Eggs. Huge sucker. I buy bags as soon as they hit the shelves, in fear that stores will run out if I wait too long. I am known to squirrel them away for as long as possible, so I can eat them in secret and not share them with anyone else. I have even eaten a bag in a day (but thankfully that was in college, and my binging has limited itself to other areas). I didn't want to go there this year, supposed to be growing up and all that noise. So I bought one bag only, and decided to make nests from my favorite macaroons. D-Money helped with these, so I didn't even open the bag until I got to her house the day before Easter. Half the bag was smashed, so we gleefully scarfed down the broken bits and had enough left for 2 dozen nests.

Bird's Nest Macaroons
(I use Martha Stewart's recipe for the Macaroons)

Ingredients:
2 large egg whites
pinch of salt
2 Tsp. vanilla
1 can sweetened condensed milk
2 14 oz. bags of flaked coconut
Cadbury Mini Eggs

Preparation:
Preheat oven to 300 degrees and line baking sheets with parchment paper or a silpat.
Beat eggs and salt until frothy and white.
Stir in vanilla and milk.
Fold in coconut until it is all incorporated.
Using a teaspoon or a 1 inch cookie dough scoop, scoop onto baking sheets. They won't spread, so you can fill 'er up!
Bake for 20 minutes or until just golden.
Using a wooden spoon end, make small indentations in the top of macaroons. Fill each hole with a mini egg. 
Transfer to a wire rack to cool.

Wednesday, March 31, 2010

Faux Peeps


Peeps. The name alone makes me shiver. I know they're cute, I know kids like them, but come on people. Peeps are fricking disgusting. They always feel stale and the colored sugar tastes like it's full of nasty chemical compounds that could help you grow a third arm. And while yes, I could use a third arm, I'm not into eating food stuffs that make me gag. I do, however, love marshmallows. I love them in cocoa, I love them in s'mores, I love them melted and poured over ice cream. While peeps are technically marshmallows, they don't taste like the real deal.

Making your own marshmallows is actually incredibly easy and quick. I make peppermint marshmallows for Christmas, so I decided to make vanilla marshmallows to replace those nasty Peeps this Easter. While the chicks are all 3D and difficult looking, I figured finding a bunny cutter to make Peeps Pink Easter Bunnies would be easy. Wrong. No Peeps bunny shapes to be found anywhere! I even searched high and low for Peeps Playdough molds to no avail. I had to make my own. Nobody had better ever say I'm not crafty!

A few notes before you begin: This is only a very easy project if you own a stand mixer. Owning a hand mixer is fine but it means that you will need to stand over a bowl, whipping constantly for at least 15 minutes. I don't really have that kind of patience, so without my trusty Kitchen Aid, there is no way I'd make these :) Also, you may want to prepare a second, smaller glass pan in addition to the 9x13. I ended up with a ton of extra marshmallow this time! You don't want to waste any of this good stuff.

Faux Peeps (Feeps?)

Ingredients:
Cooking Spray
2 cups granulated sugar
1 Tbls. corn syrup
4 envelopes gelatin
3/4 tsp. vanilla extract
2 large egg whites
1 1/2 c. water, divided

Preparation:
Spray a 9x13 inch glass pan with cooking spray and line with parchment paper. Set aside.

Sprinkle gelatin over 3/4 c. water in a bowl. Allow to sit and soften for 5 minutes.

In a small saucepan, bring sugar, corn syrup, and 3/4 cup water to a boil over medium heat, stirring constantly. Turn heat to medium high and cook until it reaches 260 degrees on a candy thermometer.

Place bowl of gelatin over a small pan of simmering water and whisk until all gelatin is melted and combined. Set aside.

Beat egg whites in stand mixer of high until stiff peaks form.

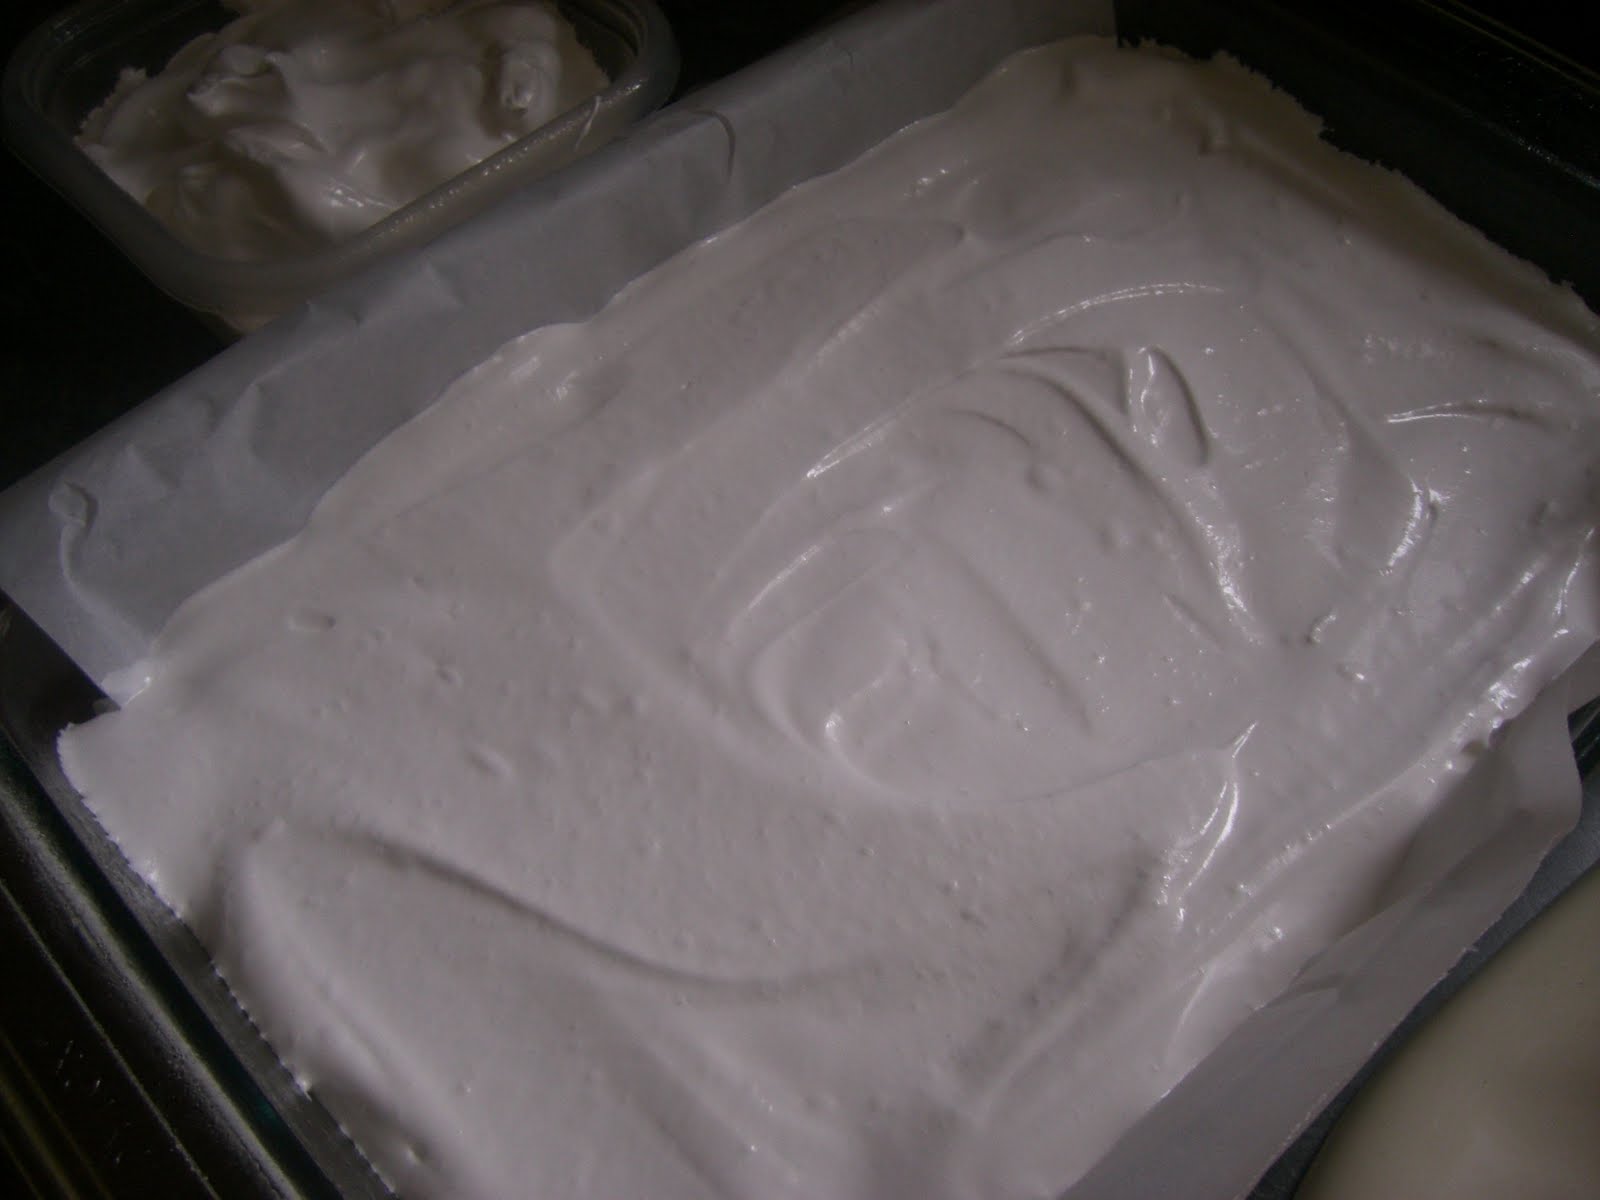
Whisk gelatin into sugar mixture. While mixer is still turned on, slowly pour sugar and gelatin mixture into the egg whites. Beat on high speed for 10-15 minutes. The mixture will get very thick and fluffy. It should look like a jar of, well, fluff.


Pour your fluff immediately into prepared pans, smoothing with a spatula. Allow to sit at room temperature for at least 3 hours. It can sit as long as over night.


Now for the fun part. Fill a shallow bowl with colored sugar. Spray your cutter (or knife) lightly with cooking spray. Cut into marshmallow slowly, as it might stick a bit. Lift carefully with your fingers and push out from the cutter into the bowl of sugar. Flip to coat on all sides and move to a piece of waxed paper.


Pipe on the teeny face. I used black gel coloring for the eyes and nose, but you could also use melted chocolate. My cutter shape came out a little wonky, and I made it much bigger than a standard Peep Bunny. I think the little pink guy felt threatened by his giant cousins. Rightfully so. 


Marshmallow on FoodistaMarshmallow

Tuesday, March 30, 2010

Enough already!

If it rains any more here in Joisey, I think I'll scream. The roads are flooded just about everywhere, and falling trees have destroyed I don't know how many adorable front porches around here. While we are lucky enough not to have been evacuated like so many people back home, it just sucks. I really wanted to make some cutesy Easter sweets today, but the gray wetness had me feeling grumpy. I made the next assignment for HBin5 instead. The Olive Spelt dough from page 96 of  Healthy Bread in Five Minutes a Day: 100 New Recipes Featuring Whole Grains, Fruits, Vegetables, and Gluten-Free Ingredients may be my favorite dough so far (sorry Soft Whole Wheat). The yogurt makes it a very soft dough, so it's partial to hanging out all over the place. Thus, it makes slammin' focaccia. Slammin', I tell you!

I used my new favorite olives for this: La Medina Classic Olive Mix. I get them on sale at Fairway and they have as many varieties as the Whole Foods million dollar olive bar. The only issue is that they don't come pitted, so you have to do it yourself. Don't have an olive pitter? Never fear! I don't either. As much as I love kitchen gadgets, I just can't justify buying more of them right now. Instead I drain the olives and dump them on a cutting board. Then I do just like I do with garlic cloves, smush them with the side of my largest chef's knife. I just press down until I feel resistance from the olive pit. Then I give the olive a little squeeze, and out pops the pit. Takes all of three minutes. Nice.


Once I mixed this dough and spread it onto parchment paper, I sprinkled it with sesame and poppy seeds and gave it a generous seasoning of salt and cracked pepper. A little drizzle of olive oil, and this baby was good to go.


But wait! What to eat with all of this bread? And why waste the heat of a 425 degree oven just for this? I had three humongous tomatoes and a head of garlic just waitin' for a roast, so I put them in, too. Never roasted garlic? Shame on you.

Just grab your garlic and peel off the papery outside skin, leaving all of the cloves intact. Slice the top (about 1/4 inch) off the head of garlic with a very sharp knife. Place the garlic in the center of a square of foil. Drizzle it with a tablespoon of olive oil and fold the foil up and around to seal. (Sorry to blind you with camera flash here, but honestly, it's pitch black night in my kitchen at 12:00 in the afternoon.)


If you are just roasting the garlic, you can place it in your oven now, but I put it in the middle of a large casserole dish. I filled the rest of the dish with quartered tomatoes, drizzled them with olive oil and a bit of salt and pepper and put the whole thing in the oven, just under my focaccia. 25 minutes later I had this...


And another 10 minutes later I had a gorgeous golden roasted garlic and some withered and browned roasted tomatoes. I've roasted garlic for up to an hour before, so you just need to test it. Give the foil packet a little squeeze (with your oven-mit-wearing paw, thank you very much) and if it gives, it's ready. I added the tomatoes and a few cloves of the garlic to my blender, seasoned it with salt and pepper and gave it a whirl. A little chicken broth and heavy cream turns it from slush to soup. Perfect for rainy day lunch, and for sopping up with focaccia. 


Thursday, March 25, 2010

When you just need a quickie...

... you can start by getting your heads out of the gutter, you filthy little minxes! I'm talking cookies here. This afternoon I have an hour before I need to run out the door and pick up the J's from school. Not usually a problem, but I feel like cookies. I have cookies in the house, yummy little Whole Wheat Fig Newtons, one of the only packaged cookies I really love. But when I feel like baking cookies, and I'm in a hurry, I have to get a bit creative. My quick cookie go-to is always chocolate chip (whose isn't?), but that requires thinking ahead and setting butter out to soften. Having not done the whole "thinking ahead" part, I thought "box."

I'm not a big purchaser of boxed cake mixes, but I do always have a big box of Bisquick on hand. I never use it. It's possible that the box I have now is the same box I bought 2 years ago. Anywho... it makes for good treats in a pinch.

Lemon Almond Tea Biscuits (cause really, they aren't sweet enough to be called cookies)
Ingredients:
1 1/2 c. Bisquick baking mix
3/4 c. almonds
1/2 cup sugar
1 lemon, juiced and zested
3 eggs

Preparation:
Preheat oven to 400 degrees. Add almonds to your chopper or food processor and pulverize them. Dump into a bowl with flour, sugar, lemon zest and juice. Beat eggs slightly, add to bowl and fold to combine.

Drop by large tablespoons (or use a cookie scoop) onto a greased baking sheet (I used my trusty Silpat, but parchment paper or cooking spray should do it). Bake for 8 minutes or until edges are golden. Transfer to a rack to cool.
Now they are yummy just like this, but they are not really sweet. They are fluffy and light little treats with subtle almond and lemon flavor. If you want them sweeter, whisk up a little powdered sugar, water and almond extract to make icing and drizzle it over the top. Want a teeny bit of sweet? Like you saw above? Well, then dust them with powdered sugar. If you haven't got a little sugar shaker, you can do what I now do thanks to my new issue of Real Simple:

Use a tea strainer. I'm telling you, those people are frickin' geniuses.

And there you go. Mixed, baked, cooled, decorated, and blogged in under an hour. Not bad. Sorry I didn't link a printable of this one, but I haven't got time to mess with Google Docs right now! I have to go pick up the kids before they start wandering around and get abducted or something. Ciao!

Thinking Spring

After weeks of record snowfall and the biggest rainstorm to hit the area in 25 years, the weather is finally beginning to cooperate with my mood. Sunshine and 60 degrees? Yes, please! The crocuses are just beginning to pop up, and I have finally packed away my winter coats. I spent almost the entire day outside yesterday, no jacket needed. The only time I spent inside was baking the latest assignment for HBin5: Carrot Bread, pages 157-159 of Healthy Bread in Five Minutes a Day: 100 New Recipes Featuring Whole Grains, Fruits, Vegetables, and Gluten-Free Ingredients. Somehow Michelle knew we'd all be ready for spring, so this bread, made with the ingredients of a carrot cake, is meant to celebrate spring flavors, and just in time for Easter.

After my experiences with the Pumpkin Pie Brioche and Chocolate Espresso Bread, I had a feeling this dough was not going to be very sweet. I loved both of those breads, but have noticed that I always need to increase whatever seasoning or spice is included in these recipes. For this dough I used Kretschmer Honey Crunch Wheatgerm (thanks to my BFF Jenny who turned me on to that years ago) in place of the plain wheat germ and increased the cinnamon by half. I added a few tablespoons of honey and 2 tablespoons of chopped crystallized ginger (one of my very favorite things!), too. In the end this bread was delicious. It made great toast and would make amazing muffins if you increase the sugar a bit. E ate some with hummus, which kind of makes me want to gag, but at least he ate it! The only thing I'd do differently next time is double the carrots! I used the required amount, but it just looks stingy and I'd like the bread to be more orange.

Other than bread and muffins, I'm at a loss for what else to do with this dough! It isn't the most versatile of recipes. I suppose I could make some rolls for Easter, but my family is so obsessed with the old school snowflake rolls that I could never replace them with carrot. That would be like forgetting the relish tray, a sin punishable by banishment (well, banishment to the kids' table, that is).

The bread braid isn't up yet for this bread (What? Am I early for once? Do I get a cookie?) but you can still visit Michelle's Blog until then to find her Carrot Cake Jam recipe.

Friday, March 19, 2010

Happy St. Joseph's Day!


March 17th is the day when everyone and their mother is Irish, even if they aren't. March 19th is the day to fake it again, but this time everyone gets to be Italian. Sweet! If you aren't Italian, or you aren't a Rhode Islander, you may have no idea what I'm talking about. La Festa di San Giuseppe, aka St. Joseph's Day, isn't exactly a commercial holiday. In all honesty, it's not much of a holiday at all, and most people, including Italian Rhode Islanders, don't even know it as anything more than the day you get to stuff yourself with the world's most delicious pastry: the zeppole. (If you want to know what today is really about, feel free to read this little history. Or not.)


I'm one of those people. I'm only a quarter Italian, even though I feel more so after my mom married a full blooded Italian with a family that kicks it old school. They clean their kitchens with mopines, make bragiole like nobody's business, and celebrate the Feast of the Seven Fishes. It's kind of worn off on me. I walk around sounding like Giada half the time. My amazing family also imparted me with some fabulous new recipes over the years, thanks to my constant nagging. One of them is for zeppoli (which is the plural of the singular zeppole or zeppola, by the way, no "s" needed!). 


Now I know that I can probably find zeppoli in many Italiaan bakeries here in Jersey, but I'm really a snob. If just happen to find yourself in RI today, stop by Antonio's on West Shore Road in Warwick or Solitro's on Cranston Street in Cranston. They make the best! If you are feeling really ambitious, you can go ahead and make them yourself. But don't be fooled! There are many zeppoli recipes out there that call for whipped cream or vanilla pudding fillings. That's just wrong. A real zeppole is filled with a yellow custard similar to an eclair or a ricotta filling, which is also the bomb.


Bigné di San Giuseppe (St. Joseph's Day Cakes)
Ingredients:
1 c. water
2 sticks unsalted butter
1/4 tsp. salt
1 Tbls. sugar
1 c. all purpose flour
4 eggs
Zest of one lemon and one orange


Preparation:
Preheat oven to 400 degrees. In a large saucepan, combine the water and butter, and bring to a boil. Add the salt and flour, whisking constantly until the mixture leaves the sides of the pan to form a ball in the center. Remove from heat and allow to cool.


Add the eggs, one at a time, beating them in completely. Add the sugar, lemon zest, and orange zest. Mix well.

Drop by large tablespoon (or use a large pastry bag to pipe large mounds) onto a baking sheet, placing the puffs three inches apart. Bake for ten minutes, then reduce the heat to 350 degrees and bake for thirty minutes or until golden. Remove the puffs from the oven. Open the puffs immediately at the top to allow steam to escape. Cool completely before filling.

Italian Custard:
Ingredients:
1 c. sugar
1/2 c. flour
1/4 tsp. salt
3 c. whole milk
4 egg yolks
3 Tbls. unsalted butter
1 1/2 tsp. vanilla extract
1 Tbls. rum (optional)

Preparation:
In saucepan over moderate heat, combine sugar, flour and salt. Add milk gradually, cooking and stirring until mixture is thick and bubbly. Lower heat, stirring for 2 minutes and remove from heat.In small bowl, add cream mixture to eggs slowly. Return mixture back to pan. Bring to gently boil for 2 more minutes, adding butter, rum, and vanilla. Tranfer to a shallow bowl to cool, placing plastic wrap on the top of the custard to prevent a skin forming. Refrigerate. Once custard has cooled completely, pipe into opened pastry shells until they are so full they might pop, top with a cherry, and dust with powdered sugar. Mangia!


 Be prepared to fight over the last one...

Thursday, March 18, 2010

If You're In Recovery

If you're anything like most of my friends, the day after St. Patrick's Day is all about laying low, nursing a hangover, and trying to remember how many pints of Guinness you drank before passing out. If you are anything like me this year, you'll be doing none of these things. While I have been known to do my fair share of St. Patty's Day partying, this year I was having none of it. Driving almost five hours home had already undone all of the good from my massage, so I was a bit grumpy. I got home just in time to throw the Corned Beef in the crock pot before heading out to work, then home to see E for the first time in almost a week. We decided to stay in, eating our American Irish dinner and watching In Bruges (which stars Colin Farrel, so at least it's a wee bit Irish).

I was left with a tremendous amount of leftover boiled meat, cabbage and potatoes, not to mention the Guinness. Not a pretty sight if you ask me. What to do with all of this before it goes to waste? Just ask Martha.

The corned beef is easy to turn into hash or sandwiches, but the rest had me puzzled. I found the recipe for Colcannon, and knew it would be perfect. If you want to make Colcannon from scratch (that is, in case you don't happen to have a bunch of boiled cabbage and potatoes lying around) you can find the instructions here.

Even Quicker Colcannon
Ingredients:
3 cups boiled potatoes, mashed
2 cups boiled cabbage, roughly chopped
1 leek, chopped
1 cup lowfat milk
1 Tbls. salt
1/2 tsp. nutmeg
4 Tbls, butter

In a large saucepan, bring milk, 2 Tbls. butter, and leeks to a low simmer over medium heat. Season with salt and nutmeg and cook uncovered for 10-15 minutes, or until leeks are tender.
Stir in potatoes and cabbage and season to taste with salt and pepper. Cook, stirring constantly over medium heat until warmed through. Pour into a casserole dish. If you want the extra butter (I didn't bother) make a well in the center and place remaining 2 Tbls. of butter into it. Put casserole under the broiler for 5-8 minutes, until top is browned and butter melted.

Hopefully I don't need to tell you what to do with leftover Guinness. In case you won't actually drink it all, you can always make dessert. I made Irish Car Bomb Brownies last year (they were slammin', by the way), but I thought I'd do cupcakes this year instead and try to lose the horribly offensive title. Apparently I'm very unoriginal :)   It seems like everyone and their mother has made Chocolate Guinness Cakes this year. Search any popular baker from Smitten Kitchen to my girl Nigella and you'll find recipe. I'm partial to a recipe given to me by a friend, but it is a secret, sorry! It is, however, very similar to this recipe of Dave Lieberman's, which I have also tried. Under bake them a bit and they are fantastic. They are actually (unlike many cakes) even better the next day if you seal them in an airtight container at room temperature once they've cooled completely. They take on an almost fudgy vibe. I like mine with the obligatory Irish Cream frosting, but buttercream is a little too heavy for it. Instead I used a cream cheese base.

Irish Cream Cheese Icing
Ingredients:
8 oz. softened cream cheese
1/4 cup heavy cream
1/2 cup Irish Cream (you don't need to use Bailey's, since it's going to be mixed with so much sugar!)
About 1 lb. powdered sugar

Beat cream cheese until fluffy. Continue beating as you slowly pour Irish Cream into the mixture. Don't worry if it looks curdled, it will smooth out! Once incorporated and smooth, add cream, beating constantly. Slowly add sugar (1/2 cup at a time), beating constantly. I like my icing to be a bit runny, so it slips off the sides of the cupcake and looks like a glossy head on a Guinness, so I actually use less than 1 lb. If you want a thicker, fluffier icing, add more sugar!

I'm Late!

Oh well, what can I say? I'm so very late posting this week's HBin5 assignment, but for good reason. My mom has been having some health issues, so I drove out to Massachusetts to spend a few days with her. I brought along some of my Lazy Loaf, and this stuffed bread for the visit. The weather was atrocious in Carver, as it was pretty much everywhere in NE. Pouring rain for three days, winds that blew trees and power lines down, and cold, cold, cold. It sucked. It was good for cooking, shopping, eating, and an hour of deep tissue massage, though! Thanks, Mom! Now on to the bread!

I used one half of my Pesto Pine Nut dough for a large loaf. I didn't get a great rise on it, so it was used for a Brick Pressed Sandwich. I used capicola, pepperoni, and prosciutto with artichoke hearts, roasted red peppers, arugala, and provolone. Love. The rest of the dough was rolled out to a half inch thickness and turned into Caprese Stuffed Pesto Pine Nut Bread. I placed strips of roasted red peppers, fresh mozzarella, and basil over the dough, sprinkled it with minced garlic, salt and pepper and rolled it up, pinching the edges to seal. I put this loaf into a loaf pan lined with parchment, brushed it with olive oil and sprinkled it with dried basil and sea salt. I'm not winning any beauty prizes for my breads lately. Despite the fact that this bread ended up looking a bit like some kind of yeasty tunnel system, it was delicious. 


And as always, stop by Michelle's Blog to see how everyone else used their pesto dough (and the Avocado bread I neglected to make this week) on the bread braid!

Friday, March 12, 2010

Au revoir Nigella!

Oh the sadness! This is the final challenge for the I Heart Cooking Clubs Nigella-Fest! Although I have not participated in every one (twice a week challenges for six months was a bit daunting), I have so enjoyed baking with the Goddess, perusing her cookbooks in the library, and bookmarking tons of recipes on her site for later. I find it fittingly Brit that the last challenge is to make a dish suitable for tea time.

I have been drooling over some of the more decadent recipes for Chocolate Cherry Cupcakes, Chocolate Pear Pudding, and Chocolate Guinness Cake (notice a trend?), but honestly, I'm the only one eating this stuff. E is still not willing to take sweets to work (as the new guy I guess that won't enter him into the Cool Kids Club) and he's "watching his weight" which means he can stop drinking beer for 3 days and drop 10 pounds. So I ended up, on this particularly gray and sluggish day, with the Lazy Loaf. Not one of Nigella's most creatively titled recipes, but certainly one of the simplest and best for afternoon tea. As this recipe is printed with lovely Brit measurements, I've converted everything for you here, for true lazy baking appeal.

Lazy Loaf
adapted from Nigella Lawson

Ingredients:
1 1/2 c. whole wheat flour
1 c. honey oat granola (or whatever granola you have)
1 cup raisins
1 packet yeast
2 tsp. salt
1 cup plus 2 tsp. low fat milk
1 Tbls. honey
1 cup plus 2 tsp. water, slightly warmer than room temperature
2 Tbls. Honey Crunch Wheat Germ (optional)

Preparation:
Add yeast to 1/4 cup of the water and let stand for 5 minutes. Mix flour, salt, and granola in a large bowl. Add yeast mixture, remaining water, honey, and milk and stir until just combined. Stir in raisins. Pour into a greased loaf pan (and as usual, I make a parchment paper sling to make it easier to remove after baking). Top with wheat germ. Place pan into a cold oven, then turn heat to 225 degrees. Bake for 45 minutes, then turn heat to 350 degrees and bake one hour. Remove and cool before slicing. Smear with butter, jam, cream cheese, or anything else your little heart desires.

Don't forget to check out the Tea Time post to see what everyone else brought to tea. And please, please vote for the next chef in the sidebar, as long as you aren't voting for Bobby Flay! I'm cool with Mark Bittman or Jaime Oliver, but Bobby? Please no! I can only grill so much, which means I'll be making margaritas for six months and turning into a drunk.
Print the Recipe

Monday, March 08, 2010

Sweet Beginnings

Breakfast is one of my favorite meals of the day. I love every kind of traditional breakfast food from pancakes and omelettes to bagels and bacon. Despite this fact, I find myself eating the same two or three things for breakfast every day, which I imagine is true for most people. If I have time to make oatmeal, it's usually my go to breakfast, otherwise it's yogurt and granola or cold cereal. Snore-fest. This summer I came across a quinoa crunch in Body and Soul magazine that I thought would be a perfect change for my granola boredom. I made up my own version and it was so easy to make!

All you need to do is toss 2 cups of uncooked quinoa into a large bowl and stir in 2 Tbls. of almond oil and 2 Tbls. of maple syrup (I use Trader Joe's Maple agave blend since it has less sugar). Spread this sticky mixture onto a Silpat on your baking sheet and bake it for 5-10 minutes at 350 degrees. Keep an eye on it, as the quinoa will burn quickly! It should be lightly toasted. Once it cools, you can crumble it up like granola! I love to toss this into my Greek yogurt with fresh fruit, yum!

While the crunch is a healthy and tasty alternative to granola (which can be high in sugar and fat if you don't read the label), sometimes you just want to go all out. While I do try my very best to eat well, there are days when I just want sweets for breakfast and I won't feel badly about it! These muffins are just the thing. Honestly on those days, anything Ina is just the thing. She's as bad as Paula when it comes to butter and sugar! I did do a bit of tweaking to add some more whole wheat and cut a little fat, but these were so moist and delicious, I wouldn't do anything else to them!


Banana Crunch Muffins
Adapted from a recipe by Ina Garten

Ingredients:
1 1/2 c. all purpose flour
1 1/2 c. whole wheat flour
2 c. sugar
2 tsp. baking powder
1 tsp. baking soda
1/2 lb. unsalted butter, melted and cooled
2 eggs
3/4 c. skim milk
2 extra ripe bananas, mashed
1 extra ripe banana, chopped
2 tsp. vanilla
1/2 c. walnuts, chopped
1/2 c. coconut
1/2 c. quinoa crunch


Preparation:
Line muffin cups with paper liners. Sift the flour, sugar, baking powder, baking soda, and salt into the bowl of an electric mixer fitted with a paddle attachment. Add the melted butter and blend. Combine the eggs, milk, vanilla, and mashed bananas, and add them to the flour-and-butter mixture. Scrape the bowl and blend well. Don't overmix.
Fold the diced bananas, walnuts, quinoa crunch, and coconut into the batter. Spoon the batter evenly into paper liners. Top each muffin with coconut, if desired. Bake for 25 to 30 minutes at 350 degrees, or until the tops are brown and a toothpick comes out clean. 

Thursday, March 04, 2010

Yes, I know, it's another soup...

The most recent assignment for HBin5 was a delicious one, and while I didn't complete each of these breads, I have to say we ate really well! I mixed up the whole batch of dough, but brought half of it with us to RI where we made thin crust pizzas with D for E's birthday dinner. This dough made fantastic pizza crust! It was light and crispy and the olive oil flavor was wonderful with our toppings: rotisserie chicken, red onion and goat cheese, and pepperoni and cheese for D. I highly recommend it!


The assignment:
1 full recipe of 100% Whole Wheat Bread w/Olive Oil from Healthy Bread in Five Minutes a Day.
Pages 81-82 – 1 loaf of 100% Whole Wheat Bread w/Olive Oil
Pages 225-226 – 1 loaf of Aloo Paratha
Pages 220-222 – 1 loaf of Southwestern Focaccia w Roasted Corn and Goat Cheese


Making pizza meant I wouldn't have enough dough for the focaccia, since I didn't want to sacrifice the Aloo Paratha. It sounded too good. While it isn't a traditional Aloo Paratha, it was pretty darn good! If you want to make a traditional Indian Paratha, visit Apartha's Blog, My Diverse Kitchen, for a recipe and handy video. When making the HBin5 version, I used one huge sweet potato in place of white potatoes. Why? I like them better, it was all I had on hand, and it's better for you, duh. I added a teaspoon full of garam masala to my potato filling and had to up the salt a bit, too. I did end up with a few air bubbles, but the flavor was awesome, and even E liked it. 


After filling my dough, I ended up with a lot of filling left over. That was one mammoth potato. I couldn't let it go to waste, so into a pot it went with a little leftover pumpkin puree, more peas, and some stock to make a soup. Fast, easy, soo yummy! Plus, with the health benefits of the pumpkin (it's loaded with antioxidants, fiber, and vitamins C and E), the sweet potato (also full of antioxidants and vitamins, that's why it's called a super food!) and yes, even the peas ( good sources of vitamin, C, K and carotenes) it's a power soup!

Triple "P" Super Soup (or Souper Soup if you are punny, which I am not, 'cause obviously)


Ingredients:
1 cup mashed sweet potato
1 cup pureed pumpkin
1 cup green peas (no need to thaw if they are frozen)
2-2 1/2 cups vegetable or chicken broth
1 tsp. curry powder
1 tsp. ground ginger
1 tsp. garam masala
1 tsp. salt
1/2 tsp. black pepper


Preparation:
Combine all ingredients in a medium pot and stir over medium heat until warmed through. And that's it, now share with friends or be greedy and freeze whatever you can't inhale yourself for later :)


As always, head over to Michelle's Blog to see what everyone else is cooking up for this assignment!


Monday, March 01, 2010

Choppin' Broccoli


My new favorite way to eat broccoli is oven roasted. I'm usually a steamer, but honestly, it makes the kitchen stink like old feet and really doesn't add any flavor. Roasting is insanely quick and easy, and it adds a whole level of flavor that really kicks steamed broccoli's ass. I won't do it any other way now!

To roast your broccoli, chop it into large florets and don't throw out the stems! Even if you aren't a stem eater, you'll want them later to make this soup, plus, tossing them is wasteful and that's just dumb. Put the pieces into a large bowl and season well with salt and pepper. Add 2-3 cloves of minced garlic, a dash of onion powder and a few tablespoons of olive oil and toss to coat. Spread in an even layer over a baking sheet lined with foil. Bake at 350 degrees for 15 minutes. You may need to remove the florets and let the stems cook for another five minutes, since they are a bit tougher!

You'll end up with broccoli that is tender and slightly browned, and with an incredible flavor. I can eat it just like this, but I also like to add it to whole wheat pasta with fresh ricotta, lemon zest, and chicken. This time I used it for soup, since it's soup week over at I Heart Cooking Clubs. I love broccoli soup, and make it whenever I have leftover broccoli anyway. Plus, Nigella's recipe for Broccoli and Stilton Soup is similar to my own recipe! Great minds :) You can substitute any kind of cheese, up the broth in place of the milk, or change up the spices to your taste. It's a very forgiving recipe. E likes heat, so I'll put red pepper flakes or hot chili sauce in his!

Creamy Broccoli Soup
Ingredients:
3-4 cups roasted broccoli
4 oz. softened cream cheese
1/2 cup shredded asiago or parmesan
2 cups chicken or veggie broth
3/4 cup milk
1 garlic clove

2 green onions, chopped
salt and pepper

Add broccoli, onions, cheese and garlic to a blender. Season with salt and pepper. Pulse until combined. Add broth & milk and puree. Pour into a saucepan and heat through over medium heat, stirring occasionally.


Print this Recipe!