Monday, January 30, 2012

Are you ready?

For some "friggin' a we made the Superbowl again" football?

Or some "oh, ok, some other team made it, but I love a good game" football?

Or a "Who cares about football, I just want to see Madonna" football?

Honestly, if the Pats weren't playing, I'd only be tuning in for a few commercials. Sleep is much too precious these days. That said, the Pats are playing *happy dance* and though E and I are happily housebound due to a certain little man, we will be hosting our own Superbowl party for two. Even without a long guest list, a big sandwich, and an ice luge, we will have good food and beer. I'm all for calorie laden gorge-fests sometimes, but I figure lightening up a few things doesn't hurt either. If you're looking for a healthy option to serve guests that can be made in advance, takes very little time or work, and is frickin' delicious, this recipe is perfect. You can keep it warm in a crock pot and let guests serve themselves while they scream at the TV. Just make sure you leave out a stack of napkins, 'cause these buggers are saucy!

Turkey Veggie Sloppy Joe Sliders
adapted from Bon Appetit, September 1999
Ingredients:
1 lb. ground turkey
3 cloves garlic, minced
1 medium onion, chopped
1/2 cup chopped red bell pepper
1/2 cup chopped green bell pepper
1/2 cup corn
3 Tbls. chili powder
2 Tbls. tomato paste
2 Tbls. Worcestershire sauce
3/4 cup ketchup
1 bottle of dark beer
olive oil
salt and pepper
Whole Wheat slider buns (Martin's makes a yummy potato version!)

Preparation:
Heat a little olive oil in a large pan over medium high heat. Add turkey and cook until well browned, crumbled with a wooden spoon. Add onion, bell pepper, and garlic and cook until veggies are tender. Add chili powder and tomato paste and cook a few minutes, stirring constantly. Add ketchup and beer and cook, stirring until foam subsides. Redeuce heat to a simmer and cook for 15 minutes until sauce reduces. Season with salt and pepper, add corn and cook until heated through. Serve on slider buns.


Crossing my fingers that I get to see this face one more time! Swoon.


Don't forget to enter my giveaway for a $25 Gift Certificate to the Shop!
You'll still get your Valentines in time for the 14th!

Saturday, January 28, 2012

Heart Felt - A Shop Update and a Giveaway!

With my favorite little papery holiday about to unroll itself into the post offices of America, I figure it's about time for yet another shop update! Valentine's Day makes me happy. It always has, even back in high school when I hosted Sergeant Josie's Lonely Hearts Club parties for all of my single friends. Funny how now I'm actually a Sargent for real. Hmph. I love all kinds of valentines, from sweet little vintage paper pieces to actually sweet baked yummies. I had to figure out a way to include some real sweets in the shop this year, since sugar makes me happy. Here's a peek at what I'm featuring for the holiday that Hallmark made:


and my Pictogram, Sign Language, and Pencil and Pop Valentines are back...


And to celebrate not only Valentine's Day, but the close of my first year selling on Etsy (Woot!), I'm doing a little giveaway, too. Leave a comment with your contact info and you'll be entered to win a $25 gift certificate to my shop!

Want to increase your odds of winning? You can earn an extra entry by:

2. Following me on Twitter and tweeting this giveaway
3. Following this blog publicly via Google Friend Connect

Leave a comment for each of the items above to make sure your entries get counted! I'll choose a winner via Random.org on next Saturday 2/4/12.


Friday, January 27, 2012

Blend

More, please!
Feeding a baby is never boring. Aside from the inevitable splatters of mush all over your face, in your hair and on the carpet, feeding a baby is a ton of fun. Being a food lover, I prayed I'd have a baby that would love food. The second the Bean spit out a mouthful of baby oatmeal, I was doubtful. When he projectile vomited avocado at me, I was seriously worried. Then he had a banana and all hope was restored. Every time I introduce Jude to a spoon filled with something new, he studies it. Checks it from all angles and then opens his baby bird mouth. He hasn't loved it all, but he eats it all. It makes for a happy mama!

We've long since mastered the art of spoon (rather than whole fist and spoon) into mouth, but feeding an older baby has it's own challenges. Namely, portion size and making sure the right nutrients are all there. I've gotten to the point where I realized combo meals are the way to go. Jude gets his fruit/veggie servings, a protein serving, and whole grain serving in every meal. It just makes my life so much easier! It may sometimes appear to be a disgusting dish (like pears, egg yolks and oatmeal, oh boy!), but homeboy digs it. Here's a little sample of how I make little man's daily menu:

His favorite meals ( the ones that literally make him squeal like a piglet) are now the things that are flavor packed, so I may end up with a foodie baby yet. These are two of our current bests:

Caramelized Cinnamon Apples
Ingredients:
6 apples, peeled and chopped
water
1 tsp. cinnamon

Preparation:
Toss apples into a large saute pan with enough water to just cover the bottom of the pan. Bring to a boil and reduce heat to simmer for 10 -15 minutes, or until the apples are tender and the water reduces. Continue cooking until the apples are browned and the water has become syrupy. Add cinnamon and puree or fork mash to desired consistency. Serve with yogurt, oatmeal, or whatever your baby likes best!
*freeze anything you don't serve immediately in an ice cube tray or refrigerate for up to a week

Pastina with Pumpkin and Parmesan
Ingredients:
1 cup chicken stock (hopefully homemade!)
1/2 cup pastina
1/4 cup pureed pumpkin
parmesan cheese

Preparation:
Bring chicken stock to a boil. Add pastina and cook until soft, about 5 minutes. Remove from the heat and stir in pumpkin. Grate parmesan over the top and serve.
*makes 2-3 servings depending on your baby! Refrigerate extras an serve in a day or two.


This post is linked to:
Friday Potluck
I'm Loving It

Sunday, January 22, 2012

Snowfall and Football...

...both excellent reasons for hunkering down with a big bowl of something delicious. We got one yesterday (our first actual snow since the freak storm on Halloween, and it's January!) and the other begins this afternoon. Unlike most of our neighbors we are not morning the downfall of the J.E.T.S. Jets Jets Jets! but gloating in the glory of the Bradylicious Patriots. Oh and suck it, Eli. I was slightly tempted to paint that on a flag and hang it from our front porch, but that may not make us popular with the rest of the neighbors. Anywho, back to the food.

Football certainly means wings and nachos and beer, but I'm more into mess-less football food. Beer yes, beer in chili, absolutely. I've made dozens of different chili recipes over the years, but this one just keeps coming back. I've tinkered with it a lot, and it gets better every time. While beer and chocolate may not be something everyone digs in chili (I can almost here the Texans cringing!) it's worth it. Cozy and hearty and spicy and yum!

Playoff Chili


Ingredients:
2 lbs. ground beef
1 large onion, diced
2 cloves garlic, minced
1 green pepper, diced
1 red pepper, diced
1 1/2 Tbls. kosher salt
2 Tbls. chili powder
1 Tbls. cumin
2 tsp. cayenne
1/2 tsp. crushed red pepper
1 tsp. cinnamon
2 Tbls. brown sugar
1 bay leaf
1 bottle of dark beer (Sam Adams' Oktoberfest works nicely!)
1 oz. unsweetened chocolate
2 28 oz. cans of crushed tomatoes
3 Tbls. tomato paste
2 15 oz. cans of kidney beans


Preparation:
In a large dutch oven over medium high heat, brown beef and drain off any excess fat. Add onion and cook until just translucent. Add garlic and peppers and cook until garlic is fragrant, about a minute. Add all seasonings and beer and cook a few minutes, stirring until foam subsides. Add tomato and bring a boil. Reduce heat to a simmer and cook for an hour. Add beans and cook about 45 minutes, or until chili is thickened. Serve with cheddar cheese, sour cream, cilantro, lime, whatever floats your boat for a garnish.

Thursday, January 05, 2012

Mush

You knew it was coming. Take anyone who cooks and blogs about food and give them a baby and it's a given. The Baby Food post. I knew way before Jude was even born that I wanted to make my own baby food. My mother always did and she swore it was easier and cheaper than buying jarred food. As usual, she was right. Making Jude's food has proven to be far less expensive than buying it (read this article for some evidence!), and with a little planning, it takes very little time. It easily fits into our hectic schedule (being a mama, running an online shop, and working part time makes for a busy chica!). I love that I can control everything that goes into his food and it is so much fun to introduce him to new things. So far, Jude loves almost everything! Avocado was not a big hit, strangely enough, but once he can have hot sauce and cilantro, I bet that'll change.

Of course there are a hundred products on the market for baby food prep and storage, and many are wicked expensive. You don't need to run out and buy a Baby Bullet or a Brezza to make baby food, though. They claim to streamline the process, but really, it's not all that difficult of a process anyway. All you need is:
- a pot
- a blender (an immersion blender is awesome!)
- and an ice cube tray.

Really. A few good resources don't hurt. Try the Wholesome Baby Food site for great ideas for recipes, info on food allergies, and tips for introducing foods. I also love the book Super Baby Food. It also has tons of recipes, as well as lots of money saving tips, but it's been instrumental in helping me figure out portion sizes and feeding schedules for Jude. The sample menu plans are awesome. I highly recommend this book!

I try to make as many fresh fruits and vegetables as I can, but some are just far too time consuming (no way will I be shelling peas!) or are not in season. Those I buy in the frozen organic section. Spinach, peas, green beans, mangoes and peaches are all ready in literally minutes. Fresh vegetables obviously need more prep and cook time. Take a free hour and do a big batch or two at once!


Did you know a batter scoop makes a
great seed remover?  Works for melon or squash!
Basic Baby Puree
Ingredients:
This method works well for fresh:
Sweet potatoes
Winter squash
Carrots
Apples
Pears
Plums
Peaches

Preparation:
Peel, chop into small pieces, and add to a pot with some water. Bring to a boil, reduce heat and simmer until fork tender. Blend in the pot, or transfer to a blender or food processor and blend until pureed. I don't bother straining as enough water helps make any fruit or veggie smooth. Transfer puree to ice cube trays (they fit about 2 Tbls. per cube) and freeze. Transfer cubes to a ziploc bag labeled with the date and food type.

That's it! Done and done. Once you get into the swing of it, the real fun begins. Adding spices, making interesting flavor combos, and changing up the texture makes for interesting meal times. Currently Jude is really digging baked apples with cinnamon, oatmeal, and yogurt for breakfast. I don't blame him, it's fricking delicious!

So seasoned mamas, what do you like to cook for you baby?


Saturday, December 24, 2011

Holiday Baking Part 2: Breakfast, Brunch, and Brinner

If you read this blog with any regularity you know how I feel about breakfast. I'd eat it all day and the only thing I like for breakfast better than bacon is french toast. I never make it though. It may be all of that beating and dunking and frying nonsense, but I do have a special place in my heart for a french toast casserole. I love that you can whip it up in a few minutes the night before and have an amazing breakfast with zero effort in the morning. You can mix up the add ins to suit your taste. I've done pumpkin and raisin, fresh berries, and of course, gouda and pears. Make this for your Christmas morning breakfast when you're too lost in a maze of ribbon and wrap to really cook, serve it for New Years Day Brunch or eat it late night anytime. So yummy!


Challah Back Apple and Cheddar French Toast
Ingredients:
1 small loaf of challah bread, preferably a day or two old
2 small apples, chopped
1 cup shredded cheddar cheese
1 cup vanilla soy milk
1/2 cup skim milk
3 eggs
1 tsp. salt
1 tsp. cinnamon

Preparation:
Slice or tear challah into cubes. Toss with apples and spread into a greased 9x9 glass baking dish. Whisk eggs, milk, 1/2 cup of cheddar cheese, salt, and cinnamon and pour over bread. Cover and chill for at least 8 hours or overnight. Remove dish from the refrigerator at least 30 minutes before baking and preheat oven to 350 degrees. Bake covered in foil for 50 - 60 minutes or until set. Remove foil, sprinkle with remaining cheese and bake another 5 minutes or until cheese is bubbly. Let stand 10 minutes before slicing to serve.

Saturday, December 17, 2011

Holiday Baking Part 1: Gingerbread Man Massacre

My best friend Jessica is full of awesome. She's gorgeous and funny and talented, can bake like nobody's business, writes for Backstage and got to interview Rooney Mara (!) just after Golden Globe noms came out, and knew enough to mail me gingerbread marshmallows all the way across the country just because. She's fabulous. So since I don't get to see her enough while she's out in LA hobnobbing with celebrities, I decided to create some brownies for her that she won't get to eat. That is until Christmas when I finally get to hang out with her!

If you haven't seen these Jet Puffed Gingerbread Marshmallows (which for some reason I keep typing as marshamallows) yet, get your behind to the closest Target or WalMart because they won't be around for long! How cute are these little guys? While they are perfect for topping cookies or cupcakes, or floating in hot cocoa, they are also awesome for holiday baking. As much as I adore them, they needed to get melted and fast. Now you all know I never met a boxed brownie mix I didn't like, but this is actually a from scratch brownie recipe. I figured I should go all out just once. However, if you are like me and honestly prefer boxed brownies or are generally lazy about baking, grab a box. Just prepare the brownie mix and bake per box instructions and add the goodies at the end!

Gingerbread Rocky Road Brownies
Adapted from Oh My God The Best Fudgy Brownies on Earth
Ingredients:
1/4 c. unsalted butter
4 oz. chopped unsweetened chocolate
4 eggs
2 tsp. vanilla extract
2 c. granulated sugar
1 tsp. ground cinnamon
1 1/3 c. flour
1 c. Gingerbread Man Marshmallows
1/2 c. semi sweet chocolate chips
1/2 c. chopped walnuts

Preparation:

Preheat oven to 350 degrees, spray a 9x9 inch glass pan with cooking spray and line with parchment paper to make a sling. Melt butter and chocolate in a medium pot over medium high heat, stirring constantly. Whisk in eggs, vanilla, sugar, and cinnamon. Whisk in flour and pour into prepared pan. Bake for 25 minutes, or top is just set. Sprinkle immediately with marshmallows, nuts and chocolate chips and return to the oven for 5 minutes or until chocolate is glossy and marshmallows are puffed and gooey. Let cool completely in pan. Lift out using parchment paper and cut into squares using a hot knife. These buggers are sticky!

Monday, December 12, 2011

Cookie Swap!

For someone who has about two minutes of spare time a day, you might wonder why I'd want to participate in a cookie swap. Usually a cookie swap entails shopping, baking, packaging, getting showered, dressed, and driving your butt and your pretty little cookies to someone's house. That is, if you aren't hosting the swap, which is another whole list of scrubbed and sparkly to-dos. As much as I adore the baking and getting together part of such a party, the getting dressed in holiday finery is just too much for me to bear lately. Luckily this is the Great Food Blogger Cookie Swap, organized by Lyndsay of Love and Olive Oil and Julie of The Little Kitchen. It's a swap by mail. No clothing necessary. Sweet!

I knew I had to make my favorite holiday cookies. My Aunt Patti's almond cookies are the best thing on her huge cookie trays, and they have tough competition. She makes about 12 kinds, but every year I squirrel away at least 12 almond cookies. It's shameful. They are amazing with a cup of tea at dessert, perfect dunked in morning coffee, and good as a quickie snack when a carrot stick won't cut it. This is an old sercet-ish family recipe passed down among the aunts, so don't tell anyone I told you.

Patti's Almond Cookies


Ingredients:
1 c. sugar
1 c. brown sugar
2 eggs
2 tsp. almond extract
1/2 c. oil
2 Tbls. cold water
1/2 tsp. cinnamon
2 1/2 c. flour
2 tsp. baking powder
10 oz. slivered almonds
6 oz. chopped almonds
1 egg white, lightly beaten (for wash)
sugar or melting chocolate (optional)

Preparation:
Preheat oven to 350 degrees. Beat first 6 ingredients until creamy. Sift in cinnamon, flour, and baking powder and mix by hand until well combined. Fold in almonds. Shape dough into 3 small loaves on a baking sheet lined with parchment and brush with egg wash. Sprinkle with sugar and bake 20 - 25 minutes or until loaves are golden. Cool slightly and slice each loaf into bars. If desired, drizzle with melted chocolate.


And a HUGE thank you so the lovely ladies who took the time to bake and ship treats to me:
Renee of Casa del Kuchen whose Chocolate Candy Cane Cookies were gone in two days,
Amilia of Just Everyday Me whose Chocolate hip Cookie Dough Bars with Pretzel Crust combined the perfect amount of salty sweet,
and Erin of Big Fat Baker whose fabulous Rolo Stuffed Chocolate Cookies came in a box that sang carols to me. I know!

Thursday the round up of all of the (500 plus!) swappers will be posted, but you can visit the Facebook Page for most of the recipe links already!

Monday, December 05, 2011

Happy Holidays!

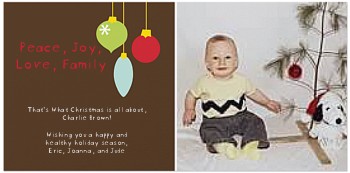
For some reason this little post got stuck and never posted, so here is a very belated Happy Holidays wish from the Bean Family :)


Mod Merry Ornaments Christmas
Turn your favorite photos into your favorite Christmas cards!
View the entire collection of cards.

Tuesday, November 22, 2011

Holiday Shop Update

Yet again, it's been a long time since I've done a shop update, but I figure it's due since I have some exciting things going on for the holidays! Well, exciting for me anyway ;) I've been working on a bunch of holiday cards, some of which are up in the shop already, and have some new products, like a Card of the Month Club. I looove sending and receiving mail, so I thought it would be a fun gift to send a new blank card each month, with postage attached. That way you and your friends can spread the letter writing love! 

I've also got a few specials running for the madness of Black Friday and Cyber Monday, which I'll be spending in my PJ's on the couch. No 3 AM shopping sprees for me! From Friday 11/25 - Monday 11/28, all of my card sets will be marked 20% off! All purchases will also come with Free Shipping, just enter the code FREESHIPHOORAY at checkout to get your discount. If your purchase is a gift, let me know in the "Message to Seller" and you also get free gift wrapping and a holiday card with your gift message! 

Take a look at some of the new listings in the shop, 
and feel free to let me know what you think or make suggestions in the comments :)


Don't forget that you can be updated of specials and holiday freebies (I'm doing a new one each week after this weekend!) by liking the Jojobean Designs Facebook page! 

Thanks all, and in case I don't see ya, have a Happy Thanksgiving!

Saturday, November 19, 2011

One More Reason to Stuff My Face

You ever say yes to something when you shouldn't? A simple something, like maybe oh, can you help me with a little party? Just a little birthday thing, no big deal. And then the next thing you know you are baking and cleaning and picking up flowers and balloons and getting stuck in traffic and decorating a dining room while nursing a baby and trying to put him to bed with three minutes to spare even though the guest of honor's flight was delayed? Yeah. That.

These are those kind of crazy cupcakes. Sigh. At least they were worth it. I know that carrot cake is usually a spring thing, but these were a special request. It was a birthday, and carrot cake with cream cheese frosting is the birthday girl's very favorite thing. Of course I had to go all overboard in the middle of 4 other projects and make her some from scratch with little carrot toppers instead of just ordering them and giving my boss the bill. Typical. They were a delicious pain in the ass that took me three days to complete thanks to Jude getting a cold, Jason forgetting he needed a Halloween costume until the last minute, and then everyone got sick. Word. So anywhosit, even though these are really a spring thing, a few recipe switches make them fabulously fall friendly. Say that 5 times fast. I switched the raisins out for dried cranberries and added crystallized ginger and coconut. Top them with turkeys instead of carrots (or just a sprinkling of coconut and cranberries) and they'd be kick ass on your Thanksgiving table. And on your ass later, cause these are so fricking fattening! Have two.

Carrot Cupcakes with Cream Cheese Icing 
adapted from Martha's Cupcakes

Ingredients:
1 lb. carrots, peeled and grated (sounds like a lot, but trust me!)
3 eggs
2 c. sugar
1 1/2 c. vegetable oil
1/3 c. buttermilk
1 vanilla bean, split and scraped
1/2 c. dried cranberries
2 Tbls. crystallized ginger, finely chopped
1/2 c. grated unsweetened coconut
3 c. flour
1 tsp. baking soda
2 tsp. baking powder
1 tsp. kosher salt
1 tsp. cinnamon
For icing:
2 sticks butter at room temperature
12 ounces of cream cheese at room temperature
reserved vanilla bean seeds
2 1/2 cups powdered sugar

Preparation:
Preheat oven to 350 degrees. Line muffin tins with paper liners. Blend carrot, egg, sugar, oil, buttermilk, 1/2 of the vanilla bean seeds, ginger, coconut and cranberries in a large bowl. Sift remaining dry ingredients and fold into the carrot mixture. Divide evenly among tins and bake for 15 minutes or until a tester inserted in the center comes out clean. Let cool completely on wire racks. Beat butter, cream cheese, and vanilla bean until very fluffy. Beat in sugar a little at a time until very fluffy, at least five minutes. Frost cupcakes.

Tuesday, November 01, 2011

The Booby List

If you are one of those people that gets freaked out about the idea of breast feeding, I'm sorry. Just go ahead and skip this post, maybe go read about my crazy former neighbors or that late night moth attack I'll never forget. I know that some people think it's weird, and that my foodie readers probably don't want to hear about boobs. Or maybe you do. But if you are a mommy-to-be and you are considering breast feeding, right on! It has been the single greatest bonding experience I have had with my little man and I could not recommend it more. Plus, it's free, and you know how I love free.
Boobie Beanie by SarasStiches on Etsy

That said, breast feeding can be a challenge, it can be scary, and it can be incredibly frustrating in the beginning. If you are dedicated to trying to stick it out, there are a few things you must have in your arsenal...

A Breast Feeding Support Group or a Lactation Consultant or at least an Experienced Friend: I can't stress this enough. I started going to a breast feeding support group when Jude was 4 weeks old, and have gone almost every week since then. There are so many moments when I thought something was wrong, but when I shared my concerns, at least 3 other moms were experiencing the same thing. I left group feeling better every time. There are a million ways to position, tons of products out there to help, and sometimes you try ten things before you find the answer. Having someone to give you feedback or just listen to you moan can be the saving grace on those tough days when you feel like a miserable moo cow. Check with your hospital or your doctor/midwife to see if there is a group near you. If not, there are online communities if all else fails. You can even contact me! I'm not an expert, but I'm happy to listen to you cry it out via email.

Nipple Cream: You are going to have some pain. It can range from a bit of chafing to toe curling pain every time your baby latches on. One way to ease that early pain in the boob is the right nipple cream. Many of the women I know use Lansinoh , but I hated it. It was so thick and greasy! I switched to First Years Nipple Butter and loved how much smoother it was. Plus, I like that it has no lanolin, because it kind of freaks me out to rub sheep grease on my lady parts. I used it after every feeding and the soreness was gone within a few weeks. However, if you have severe pain that lasts longer than a few weeks, you may want to ask your doctor for a prescription for Dr. Jack Newman's All Purpose Nipple Ointment or APNO. It is the stuff of dreams.

A Good Breast Pump: Especially if you are going to go back to work (but even if you just want a partner/sitter to give a bottle now and then). Most of the women in my group have the Medela Pump InStyle Advanced and love it. It really doesn't matter what brand you have, but get a good one. It will save you time and frustration. Many insurance plans cover all or part of the cost now, and all of the cost is tax deductible. Just be aware that, especially in the beginning, you may not produce a lot. You may never produce a lot, but don't freak about it. Your production could be anywhere from 1/2 an ounce to 8 ounces per pumping session depending on a million factors. How much water or caffeine you drink, how much glandular tissue you have, when you last nursed your baby... It all comes into account.

A Hooter Hider: Some kind of nursing cover is a necessity for feeding your babykins in public, which you are bound to have to do at some point! A blanket or burp cloth will always do in a pinch, but a real nursing cover is worth registering for! The strap around your neck helps prevent your sweetie from tearing it off and exposing your hoohas to the world, which will happen. I assure you. Most also have a stiff band in the neckline so that you can peek down to check on your baby's progress. I have also used mine as a makeshift changing pad, a stroller shade, and a beach blanket. It's great.

Well Fitting Nursing Bras: Go buy several brands before you give birth. Try to clip and unclip them with one hand in the dressing room. If you can't do it easily, don't buy it! Grab a few nursing tank tops while you're at it. The Gilligan and O'Malley ones from Target are great, and (obviously) affordable. Get fitted professionally if you have to. Your girls are going to change so dramatically over the first few weeks that having an uncomfortable bra will make you so miserable.

One fun thing to also get is this beauty. Come on, you know that photo is funny. But seriously, it makes folding laundry, typing emails, or just stuffing your face possible while pumping. It may make your breasts look like superheroes in disguise, but it's worth it if you are going to do lots of pumping!

So ladies in the peanut gallery... Did you breastfeed? What are your favorite tips/products?

Thursday, October 13, 2011

Cozy up

It makes me sad that the woman credited in many food circles for "bringing back" the crock pot is Semi Homemade Sandra Lee. First of all, the Crock Pot never left. Like sexy, it didn't require a comeback. Second, Sandra Lee is the devil. Just because someone out there keeps buying her cookbooks, doesn't mean the rest of us look to her for cooking inspiration. The idea of stirring three cans of soup into a can of chicken and a block of cheese and calling it dinner gives me the shivers. That said, I am all about short cuts. Just please make one of those short cuts a rotisserie chicken instead of a can, then you don't even have to open it.

My crock pot makes me happy because there is nothing like coming home to a kitchen that smells incredible and a meal that is ready to go. I have a few go-to favorites, and this is one of them. Served with some purple cabbage slaw, it is the perfect fall dinner. No cans required.

Cider Braised Pork Roast

Ingredients:
3 lb. boneless pork loin
4-5 apples, cored and quarted
2-3 shallots, chopped
3/4 cup apple cider
3/4 cup chicken stock
1 tsp. dried thyme
1 tsp. dried sage
1 tsp. black pepper
2 tsp. kosher salt
olive oil

Preparation:
Blend thyme, sage, salt and pepper in a small bowl. Rub all over pork. Heat a small amount of oil in a large skillet over medium high heat. Add the pork to the pan and cook 3-4 minutes perside, or until well browned. Place apples and shallots in the bottom of the crock pot and place pork on top. Over medium heat, pour a bit of the cider into the pan to deglaze, scraping up any browned bits. Add to the crock pot with remaining cider and stock. Cook on low for 8 hours.

Tuesday, October 11, 2011

Some Like It Hot

Despite the crazy Indian Summer weather we've been having here in the Jerz, I'm in the mood for fall food. To me that means soups, stews, slow cookers, and potatoes. This week I'm fitting all of those in, heat wave or not. First up was an attempt to clear out some of the random ingredients tucked away in the fridge before we take off for the weekend. Occasionally I come up with something I totally love when I have no plans. This is totally one of those times. I can see this dish becoming a staple. It was so delicious! It becomes a really quick meal if you have some things done in advance (like extra sausage cooked from a pasta dish the night before, and the tomatoes and garlic roasted while you do laundry in the afternoon:)).

Seafood and Sausage Stew with Roasted Tomatoes

Ingredients:
1 lb. bay scallops
1 lb. large shrimp, peeled and deveined
1/2 lb. spicy Italian sausage
1 medium onion, diced
1 medium red pepper, diced
1 medium green pepper, diced
1 head of garlic
6 medium tomatoes
3 cups of chicken stock
1 tsp red pepper flakes
salt and pepper
olive oil

Preparation:
Preheat oven to 350 degrees. Slice the top off of the head of garlic, drizzle with a bit of olive oil and wrap in foil. Place in the center of a baking dish. Slice tomatoes into quarters and arrange around the garlic. Drizzle with oil and season with salt and pepper. Bake in the oven for 45 minutes to an hour or until tomatoes are soft and begin to brown. Cool slightly. Unwrap the garlic and squeeze into a bowl, reserving half for another use. Using a blender or food processor, puree tomatoes with half of the roasted garlic. Set aside.

In a large saute pan, heat a little oil over medium high heat. Add sausage and cook until browned, crumbling with a spoon. Add onions and peppers and saute until tender. Season with salt and pepper to taste. Add tomato puree and chicken stock and bring to a boil. Add red pepper flakes, reduce heat to a simmer, and cook for 10 - 15 minutes. Add shrimp and cook for 2-3 minutes before adding scallops. (If you are using small shrimp, you can add both shrimp and scallops at the same time). Cook until scallops are opaque and shrimp are pink and cooked through, about 3 more minutes. Serve in large bowls over a hunk of crusty bread for sopping!

And by the way... Congratulations, Danielle, for winning my 5th Blogiversary Giveaway!

Sunday, October 02, 2011

Celebrations and Another Giveaway!

It's been a big week. Jude celebrated his half birthday, which has me shaking my head in disbelief that our little man has been with us for a whole six months. It's crazy. I can not get over how freaking amazing he is. My awesome aunt Janine of Angel Art Photography shot his baby photos (she did my maternity photos and his newborn shots, too) and they are incredible. Seriously, if you are anywhere in the Westborough area, call her. She's magic!

We had a long visit from my parents, finished another custom wedding invitation order, welcomed E home from a 2 week business trip to Munich (conveniently scheduled during Oktoberfest, nice huh?) and then my little blog turned 5. Yep, and 5 years of blogging equals, you guessed it, a giveaway.

This year I am super excited  to have a great group of Etsy teammates who are willing to offer you guys some of their wares.   Lucky ducks, you! 

***
First up is a $15 gift certificate from Barbara Dannenfelser of Quilted Hugs Bibs: "I make quilted, waterproof bibs in sizes from infant to toddler with coordinating paci clips and burp cloths. I've been sewing forever and quilting for about 35 yrs. When my granddaughter was born in 2009, of course I started making quilty things for her. At some point I made her a quilted bib and everyone loved them. So, being the fabric junkie I am, I pulled all the prints I thought would be good for bibs and then bought more!" 

Check out Barbara's cute Halloween line of bibs and accessories! I love these binky clips, too!


Next up is PopsicArt: PopsicArt is Joshua Zaitz, who creates whimsical 3D pop art of musicians, celebrities, iconic images and famous places. The artwork features vibrant colors and fun themes offering viewers a unique 3-D experience. Hand-cut pieces are glued layer by layer to the background picture. Since every piece of artwork is hand-cut, constructed and embellished differently, collectors of my artwork each receive a unique piece of art. Joshua is giving away this 

Dunkin Donuts Coffee Cup Logo 3D Pop Print. It measures 4 x 6 inches and is valued at $20.


You will also win your choice of either the Purple Haze Earrings or Halloween Hair Clip from Jamie of Jamie's Precious Metal. "My name is Jamie Menake and I am a jewelry artist living in New Jersey. My passion is creating beautiful jewelry that people will want to wear everyday! I work primarily with Precious Metal Clay and sterling silver. I have been studying with a pioneer in the PMC world, and seriously designing jewelry since 2005. I have two children whom I adore, so I work mostly during nap time and in the evenings." 


I will be tossing in a Halloween goodie bag from my own shop including a set of my Halloween Chalkboard Cupcake Flags a set of Recycled Chalkboard Gift Tags in Halloween colors, and a Halloween greeting card. 

The total value of this giveaway is $70.

How to enter: All you need to do is leave a comment to enter! Don't forget to leave me an email to contact you if you win.

You may of earn up to 3 extra entries for:
1. liking the Jojobean Designs Facebook page
2. Tweeting this giveaway
3. Blogging about this giveaway
Leave a new comment for each of these 3 extras with the link for varification.

This giveaway ends at midnight EST on October 10th, 2011. A winner will be chosen via random.org.

In addition to the prizes, the following shops are offering exclusive coupon codes for generous discounts in their shops!

Alicia's Jewelry Shop: 20% off your purchase using code SPECIAL811
Woodstream Dream: 15 %off your total purchase using code SNICKERBLOG15
La Classique Bonita: 25% any purchase using code HAPPYANNIVERSARY


Monday, September 26, 2011

Pumpkin Spice and Everything Nice


Forget changing leaves. Forget dropping temperatures. The official mark of the arrival of fall is the arrival of the Pumpkin Spice coffee and Pumpkin muffin at Dunkin Donuts. Now I admit that eating a pumpkin muffin is like birthday cake for breakfast, but I'm all for it. At 600 calories and 26 grams of fat, it is certainly a splurge. It's also the size of my head. In order to enjoy my favorite fall treat more often without feeling even a twinge of guilt, I make my own. I even brew my own Pumpkin Spice coffee, but only because finding a Dunkin' drive thru in northern Jersey is like finding the Loch Ness monster. These muffins are super moist and amazing, but don't get me wrong, these muffins aren't healthy. They are just smaller. So they are healthier, right?

Pumpkin Spice Muffins
Ingredients:
4 large eggs
1 1/3 c. sugar
15 oz. pumpkin puree
1 c. vegetable oil
2 c. all purpose flour
2 tsp. baking powder
2 tsp. cinnamon
1/2 tsp. nutmeg
1 tsp. salt
1 tsp. baking soda
1/2 c. chopped walnuts
1/2 c. brown sugar
1/2 c. butter, cold
1/4 c. all purpose flour

Preparation:
Preheat oven to 350 degrees and line the cups of 2 muffin tins with paper liners.

In a large bowl, beat eggs, sugar, oil, and pumpkin until smooth, add 2 cups flour, cinnamon, nutmeg,salt, soda, and powder and beat until smooth. Pour into prepared tins. In a medium bowl, crumble walnuts, brown sugar, 1/4 c. flour with a fork until combined. Sprinkle evenly over muffins. Bake for 25-30 minutes or until a toothpick inserted in the center comes out clean. Cool on wire racks. Drizzle with icing.

Wednesday, September 14, 2011

A Follow Up and a Giveaway...

For those of you who are still feeling like cloth diapering may be too much for you, do not despair. It's not an all or nothing deal, anyway. At least not in our house. It was a few weeks before we put Jude in cloth when he came home from the hospital, and in that time we tried at least 5 types of disposable diapers. That's how we learned about his super sensitive skin. The one diaper that didn't cause a reaction was the Seventh Generation brand. 


This made me happy. Not only are they Bean's bum friendly, but they are also earth friendly (or friendlier as disposables go). We always keep a small stash on hand for the days I go brain dead and forget to toss the cloth diapers in the wash early enough. We've also begun using them at night, since even double lined cloth just isn't cutting it between 2 and 6 AM. It's the witching hour.


My Blog Spark and Seventh Generation sent us a pack of the newly reshaped Free & Clear Diapers to try, which I love since we already dug the originals. You can get a pack, too (details in a bit)! And don't worry, if you get hooked, you'll still be able to save. Go over to Amazon's Subscribe and Save and get 15% off a case. We only have them delivered every 2 months since we use them rarely. I figure it is still cost efficient for people who use disposables all the time, since you can cancel and renew subscriptions over and over to still get the discount :)


Here's the skinny:
The Seventh Generation Free & Clear diapers do not include chlorine processing, fragrances, latex and petroleum based lotions. With processed chlorine-free wood pulp in Free & Clear diapers, no chlorine is released into the environment during the  whitening process of the diapers. Seventh Generation has also reduced the size of the diapers´ plastic packaging, meaning that each pack now contributes even less overall landfill waste than before. In fact, Seventh Generation Free & Clear diaper packaging can now be recycled at local supermarkets where plastic bag recycling collection boxes are available.  


Click here to save $2.00 off Seventh Generation Diapers: http://bit.ly/seventhgendcoupon


Enter and win a pack of Seventh Generation diapers for your own Bean's booty! 
How? Just leave a comment with a contact email so I can reach you!


For up to 4 extra entries do one or all of the following and leave a new comment for each entry:
1. Like this blog via Google Friend Connect
2. Like Jojobean Designs on Facebook and share this giveaway with friends.
3. Follow me on Twitter and tweet this giveaway.
4. Visit Jojobean Designs on Etsy and come back here to tell me what item is your favorite, or suggest something you'd like to see in the shop!


This is a quickie giveaway, so be sure to get your entries in! Giveaway ends on Friday, 9/16/11 and I'll post a winner (chosen via random.org) on Saturday, 9/17/11.


All info, prize packs, and coupons are provided by My Blog Spark and Seventh Generation.
Blog Search

Wednesday, August 31, 2011

The Booty List

All you need for cloth diapering your super sensitive baby and getting a sort-of-reluctant husband to help out...
When E and I first began discussing cloth diapering, there were really only two questions he wanted answered: How much will it cost? and What do I have to do?


When he realized that it would be far less expensive to cloth diaper our little man than to use disposables, he was all for it. In case you haven't researched it, disposable diapers from birth to potty training can cost anywhere from $1,000 - $2,000 depending on brand and how you shop. Fricking ridiculous, really. Add in the insane amount of trash that you're tossing into a landfill and the pain doubles. For me it was a no brainer.

And then I had to buy some diapers. Cruising around the internet you can get mighty overwhelmed by the amount of information out there about cloth diapering. What the hell is an AIO? Prefolds? Chinese Prefolds? It was like learning a new language. Luckily I had one lone friend of a friend who cloth diapered her daughter, so I followed her lead. If you are interested in finding out all of the basics on CD'ing your kiddo, read here: The Cloth Diapering Mama. It's a great starting point!

Once you decide what kind of diapers you want, you'll need to develop a system. But don't sweat it, like everything else about new babies, you'll figure it out. There are countless products to store, clean and transport your diapers, but you really don't need much. Here are the must have items in our house:

One Size Pocket Diapers by bumGenius and Fuzzi Bunz: We picked the bumGenius because our friend used them and loved them. Then I met a girl who loved her Fuzzibunz. Ask everyone what they prefer and you get a different answer. Different brands fit differently, and what works for one baby won't for another. I chose one size pockets because I like the idea of buying one diaper that will fit from birth to potty training. I'm a cheap ass. If you don't want to spend a fortune figuring out what brand is best for you, try this great Trial Offer from Nicki's Diapers. I wish I'd known about it before!

Cotton/Hemp Liners: Totally necessary for pocket style diapers, especially if your babykins turns out like mine. They call them heavy wetters. He'll be so happy to see that on the internet when he's older. I use the ones made for gdiapers, only because I got them at my baby shower. The gdiapers system ended up being craptastic for us, but the liners fit inside of our diapers, so it wasn't a total loss. You can get them at Babies R Us, too, which is awesome if you get lots of gift certificates and can't figure out what to buy. Those bastards only started carrying bumGenius after Jude was born. Bugger.

Wet Bags: We keep a large hanging wet bag on a hook in our bathroom. It just made more sense to toss dirty diapers in there once we sprayed them, rather than toting them back to the nursery. A little eucalyptus oil sprinkled inside after each wash keeps the bathroom from getting toxic. We also have a couple of smaller zippered style wet bags for going out. I keep one in the diaper bag and one in the car. They are great for wet clothes, too.

A Diaper Sprayer:  E was a bit disturbed when met with his first soiled diaper, even after we had purchased and installed the sprayer and I explained what it was for. Imagined poo is clearly easier to handle than actual poo. This bad boy makes our lives so much easier. I know a lot of moms use a pail and swish diapers around in water, but I can't imagine getting E to do that. Actually, I can't imagine myself doing that. This thing is like a super powered water gun, so spin it that way and it may be easier to get your reluctant man on board :) Just warn house guests that it isn't a bidet. Trust me.

CJ's BUTTer: My friend Kayster turned me on to this incredible stuff. Since you can't use commercial diaper creams with cloth, I needed something as a "just in case." The disposable diapers we used when Jude came home from the hospital gave him a terrible rash and this cleared it right up! Jude is so sensitive, and this has healed every single spot. Even his heat rash (which the pediatrician claimed could not be treated) was gone in a few days after I applied some BUTTer. The scents are also awesome (Oatmeal, Milk, and Honey is my fave) and it can be used for any skin issue. That reminds me, I'm almost out.

California Baby Diaper Area Wash: We can't use commercial wipes very often without Jude breaking out in a rash. At home we use baby washcloths and water, but it can be hard to get to a sink when we're out and about. I keep a travel sized spray bottle with this wash diluted in water in the diaper bag and it's perfect. A few spritzes on a dry cloth and you're good to go. Plus, it smells awesome, which is great when your cute little bugger stinks to high heaven.

All in all, it seems like a lot of work to cloth diaper, but it is not and it has been so worth it. Along with the financial and environmental benefits, our little man has very few skin issues with cloth, and he looks pretty cute, too. Agreed?