Woot woot! This adorable treasury full of gift ideas for gardeners made Etsy's front page late last night. And look who was featured in the top row! So excited. I made a sale and got more views than ever. Thank you, Rachel!

Thursday, December 13, 2012
Tuesday, December 11, 2012
The Great Blogger Cookie Swap

- Butter, sugar, flour,
- crumbling between my fingers.
- Add a little spice.
- God, I'm so deep, yo. I can't even stand it:) No really, I'm just writing cookie haiku because last year (year one of the most epic cookie swap of all time) a participant of The Great Food Blogger Cookie Swap wrote an entire cookie themed version of 'Twas the Night Before Christmas. It was adorable. And I can't find it. So if you remember who wrote that post, please hit me up and I'll link it here! Meanwhile, little ol me, former Spoken Word poet and current cookie lover, can only come up with a haiku. Maybe that's because my son has finally fallen asleep for his morning nap and it's 4:00 in the afternoon. FML. So many things on today's to do list, and this post may be the only one I check off.
- For this year's cookie swap (which happens to be for charity this year, by the way. Each blogger made a donation to Cookies for Kids Cancer and you can plan your own cookie swap at home to do the same!), I made one of my favorites, Vanilla Chai Spiced Crackle cookies. This is a recipe I developed while I was living in Ann Arbor, back when I had no kid and thus ample time for developing recipes that weren't pureed. I brought the first ever batch in to share with the English department at school, and they were gone in a blink. Just FYI, teacher's break rooms are a great place for recipe testing.
- These are a crunchy cookie with a bit of bite and they are best dipped in coffee or tea. I sometimes drizzle them with chocolate, if I'm feeling super ambitious, and I actually prefer them with an extra 1/2 tsp, of kosher salt. It gives it a tiny salty bite that is so yummy. They pack and ship well, so they are perfect if you have anyone to whom you would like to mail something sweet. You know you do.
- Vanilla Chai Spiced Crackle Cookies
- Ingredients:
- 1/2 c. butter, softened
- 1/2 c. shortening
- 1 c. sugar, plus 1/4 c. for rolling
- 1/2 c. brown sugar
- 1 egg
- 1 1/2 tsp. vanilla
- 2 1/2 c. flour
- 1/2 tsp. salt
- 4 tsp. baking powder
- 2 tsp. cinnamon
- 1 Tbls. chai spice mix, plus 1/4 tsp. for rolling
- 4 oz. white chocolate (if desired)
- Preparation:
- Preheat oven to 350 degrees. Blend 1/4 tsp. chai spice mix and 1/4 c. sugar, set aside.Cream butter, shortening, and sugars.Beat in egg and vanilla. Sift remaining ingredients and add to butter mixture, blending until combined. Shape dough into 1 inch balls and roll in sugar/chai blend.Place at least 1 inch apart on parchment lined cookie sheets and flatten with the bottom of a glass or your palm. Bake for 10-12 minutes or until just golden. (Keep an eye on them as they will turn from perfectly golden to crunchy brown very quickly!) If you wish, melt the white chocolate in a double boiler and drizzle over the tops of cooled cookies. Store in an air tight container for 2-3 days.A big thank you to the lovely blogging ladies who send me scrumptious treats in the mail! I love mail of any kind, but cookie mail? That's the bestest!I scored a box of melt in your mouth buttery white chocolate cookies drizzled in milk chocolate from Mari, gone before E even made it home from Cali. Too bad so sad.Kara of Kara in the Kitchen sent me some fudgy peppermint brownie bars that disappeared in mere hours. I think I blacked out somewhere in that time, because suddenly I looked down and they were gone. I can't be held responsible when chocolate is involved.Jennifer of Bake or Break sent these gorgeous brown butter snickerdoodles, which I'm kind of obsessed with. I actually just ate one of them while typing this. These are going on my to-bake list stat.And another big thank you to the ladies who posted photos of the cookies I sent to them via Twitter and Facebook. It's nice to see they all made it in one piece:)And the last big thank you is for Lindsay of Love and Olive Oil and Julie of The Little Kitchen. You guys are amazing for doing all of the work required to make this cookie swap of epic proportions work. You're also crazy. Like the crazy fabulous kind of crazy.
Monday, December 10, 2012
Sippity Sup

MMM, soup weather. Gray, wet, chilly, and all sorts of gross outside weather. The kind of weather that makes you want to pull the covers over your head, read a book, and forget the world for 24 hours. I know you feel me. Today is one of those days. Luckily I made a big batch of this tomato soup with roasted garlic, so I'll be sippin' on a big ol mug of this goodness today. As will Jude, who happens to love it as much, if not more, than I do. He'll take his with grilled cheese on whole wheat, sliced into sticks. And in a sippy cup, please.

I have posted plenty of tomato soup recipes before... But I think I've perfected it this time! This is easy and oh so delicious! Plus, it makes a fantastic gift or pick me up for someone who is feeling sick or blue. Wrap a loaf of fresh bread in a tea towel, label a jar with a fantastic reusable Chalkboard Sticker Label, and you have a perfect gift;)
Roasted Tomato Soup with Garlic and Rosemary
Ingredients:
3 pints grape tomatoes
1 head of garlic
2-3 sprigs of fresh rosemary
1 15 oz. can of crushed tomatoes
2 cups of chicken (or veggie) stock
1-2 Tbls. kosher salt, divided
black pepper
olive oil
Preparation:
Preheat your oven to 400 degrees. Slice the top off of your head of garlic. Place in the center of a square of foil and drizzle with olive oil. Fold the square up and twist to make a packet. Place the packet in the center of a baking dish.
In a large bowl, drizzle tomatoes with olive oil and season with salt and pepper. Toss to coat. Pour into the baking dish with the garlic. Roast for 1 hour or until tomatoes have blistered and browned. Turn tomatoes with a spoon a few times during roasting to make sure they all cook evenly.
Transfer tomatoes to a large stock pot over medium high heat. Add stock, crushed tomatoes, and half of the rosemary (removed from the stem!). Unwrap the garlic and squeeze as much as you like into the soup (I find that about 5 cloves does it for me). Season with remaining salt and pepper and heat until boiling. Reduce heat to a simmer and cook for 10-15 minutes to allow flavors to blend. Remove from heat and blend using an immersion blender until smooth (or use a regular blender if you must, just remember to put a towel over the top and go slowly so it won't explode tomato all over you and your kitchen). Pour into a jar with the remaining sprig of rosemary for giving, or eat it all up before it gets cold!
Wednesday, December 05, 2012
The Gift of Giving
 Ah, the holiday shopping rush... so much fun isn't it? Well sure it is! If you do it correctly! I'm lucky in that I don' have to buy a ton of gifts. I do have a shortage of time and a tight budget, however, so that can always make things tricky. I have a strategy. Come up with one good idea and get everyone the same thing. Last year it was hooded towels. Seriously. I found a killer hooded Yoda towel at the Ridgewood Craft show and fell in love. I then bought six more towels online via Etsy for my nephews, cousins, and the kids I used to babysit. They were a huge hit. This year it's newsboy caps. I just ordered six of those. There's always a few books, girly things, and treats that sneak into the shopping, but at least 75% of what I buy is handmade. Craft shows help. Like the one I did last weekend at West Side Advent-ure. That's my table. Cute, no? I got a great response and it was my most successful show so far, so I'm very happy! All of the new card designs I did for the show are sneaking into the shop this week.
Here's one I love the bestest:
 |
| Baby It's Cold Outside |
'Itty Bitty Holiday - GIfts for Baby' by jojobeandesigns
Perfect presents for that bitty bundle of joy, and for mommy of course:)
 Baby's First Christ...
$29.00
|  Crochet Off White baby ...
$16.99
|  Airplane baby mobile - ...
$44.00
|  Waldorf doll, organic g...
$63.00
|
 READY TO SHIP Baby sant...
$18.00
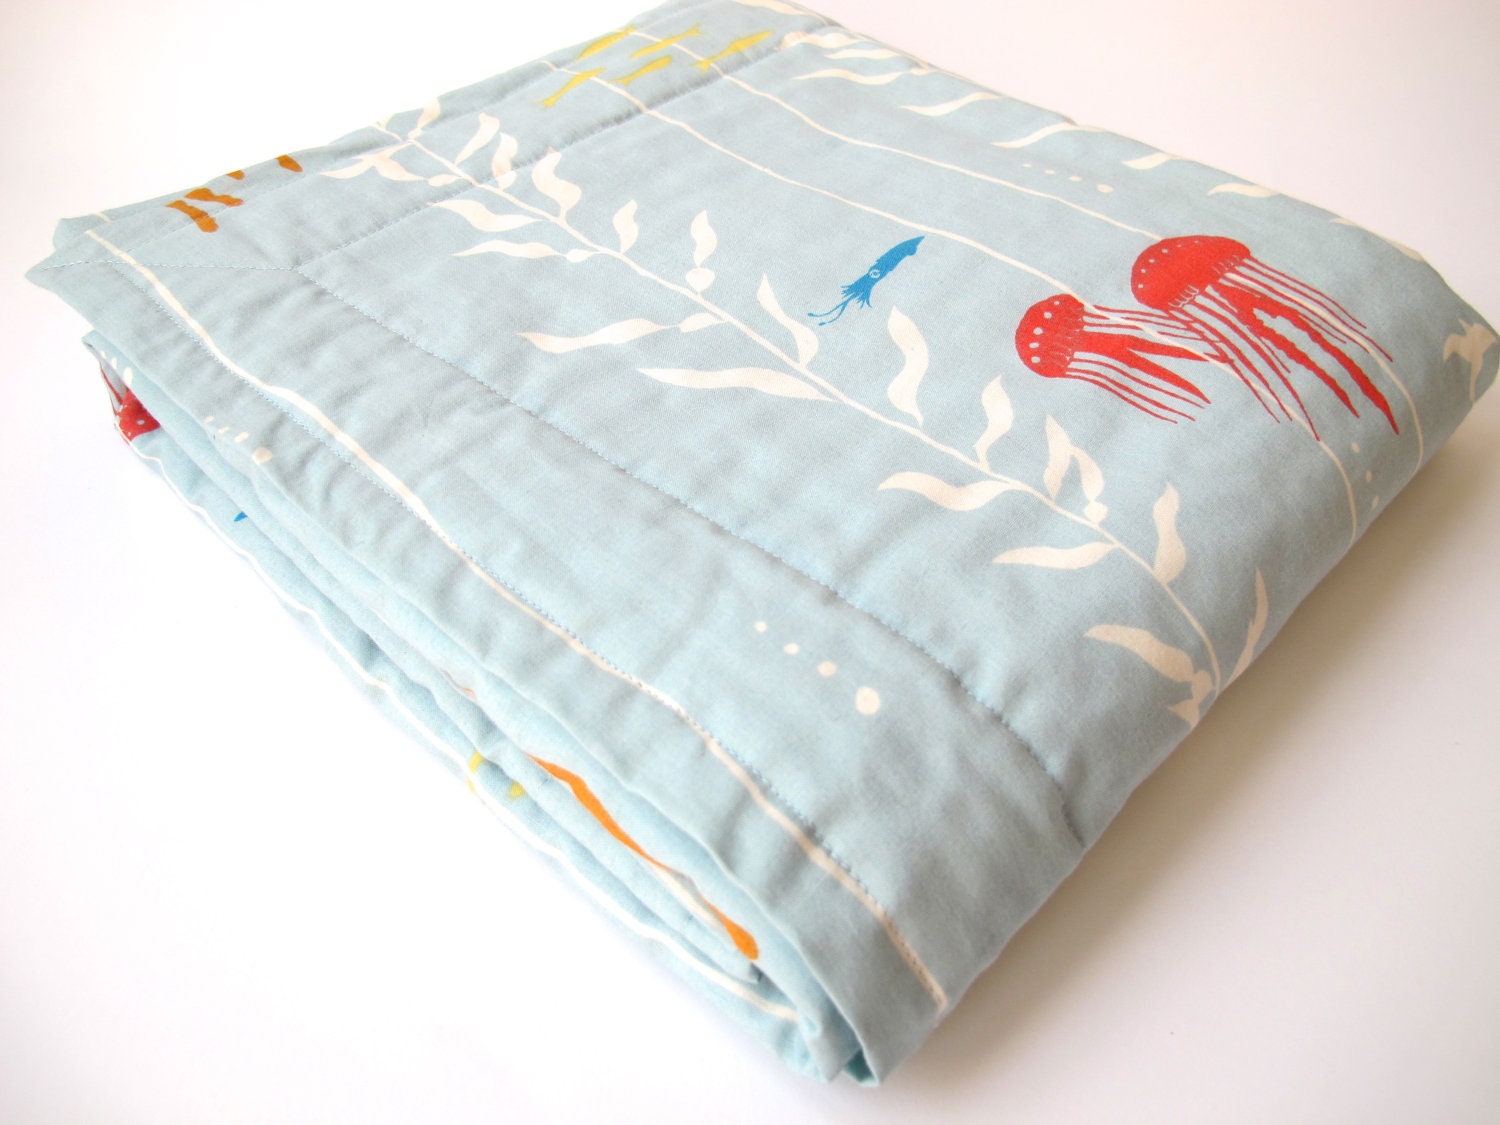
|  Hemp Baby Blanket / Rec...
$25.00
|  Organic Infant Onesie: ...
$24.00
|  custom christmas stocki...
$15.00
|
 Hand knit classic Irish...
$48.00
|  Harry Potter - Infant O...
$16.00
|  Organic Baby Blanket wi...
$52.00
|  Christmas Baby Leg Warm...
$12.00
|
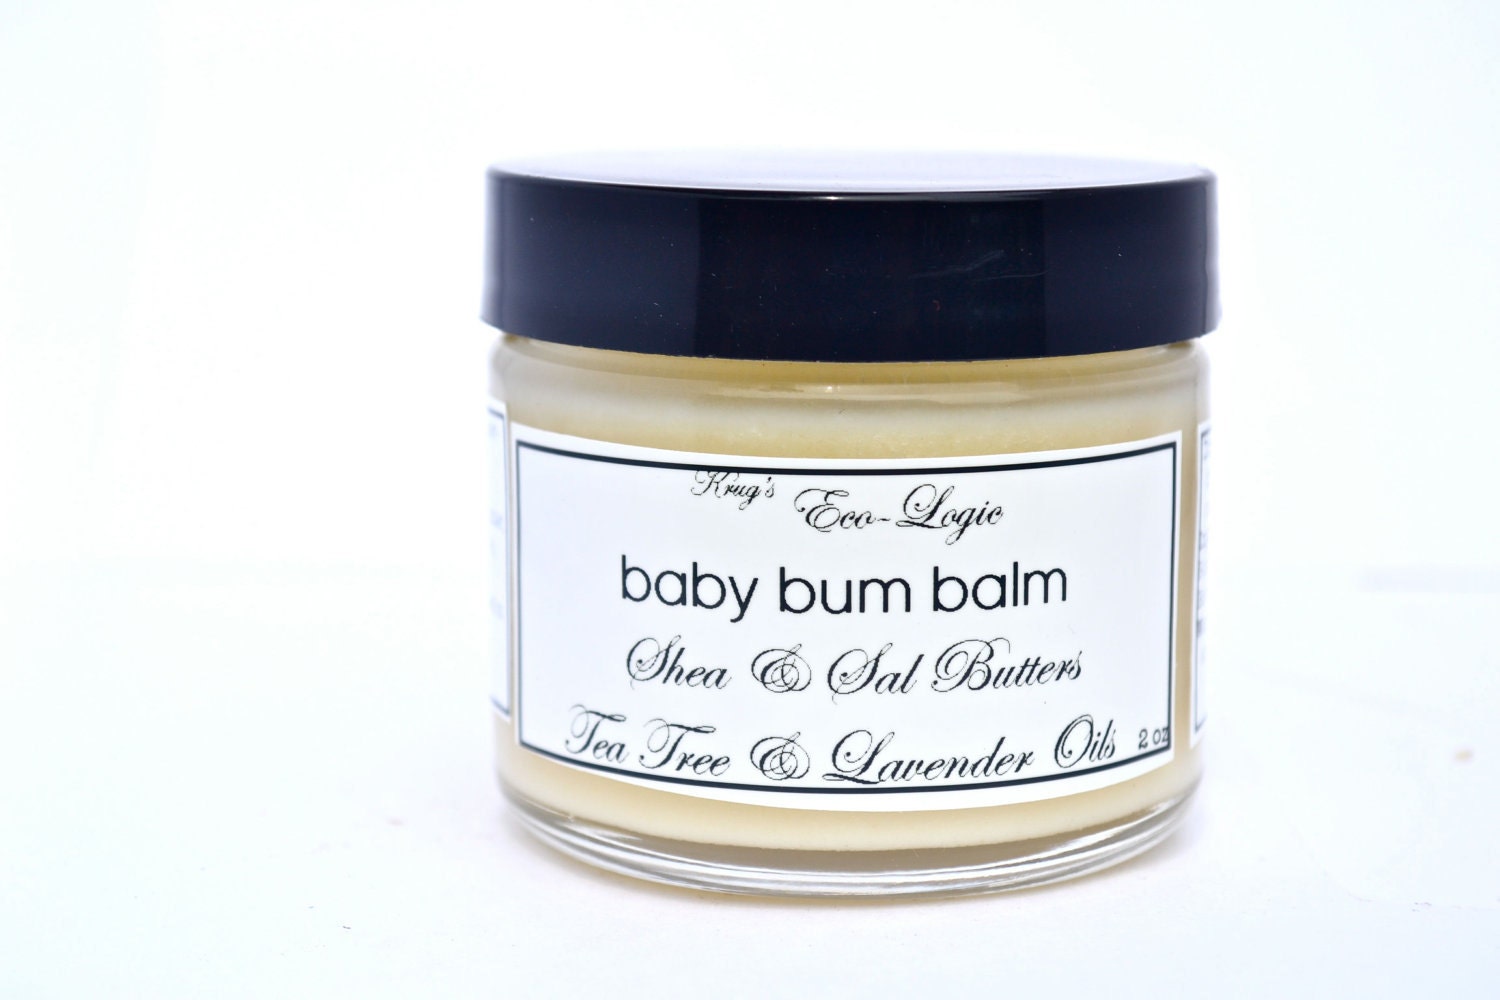 Natural Shea Butter Tea...
$20.00
| 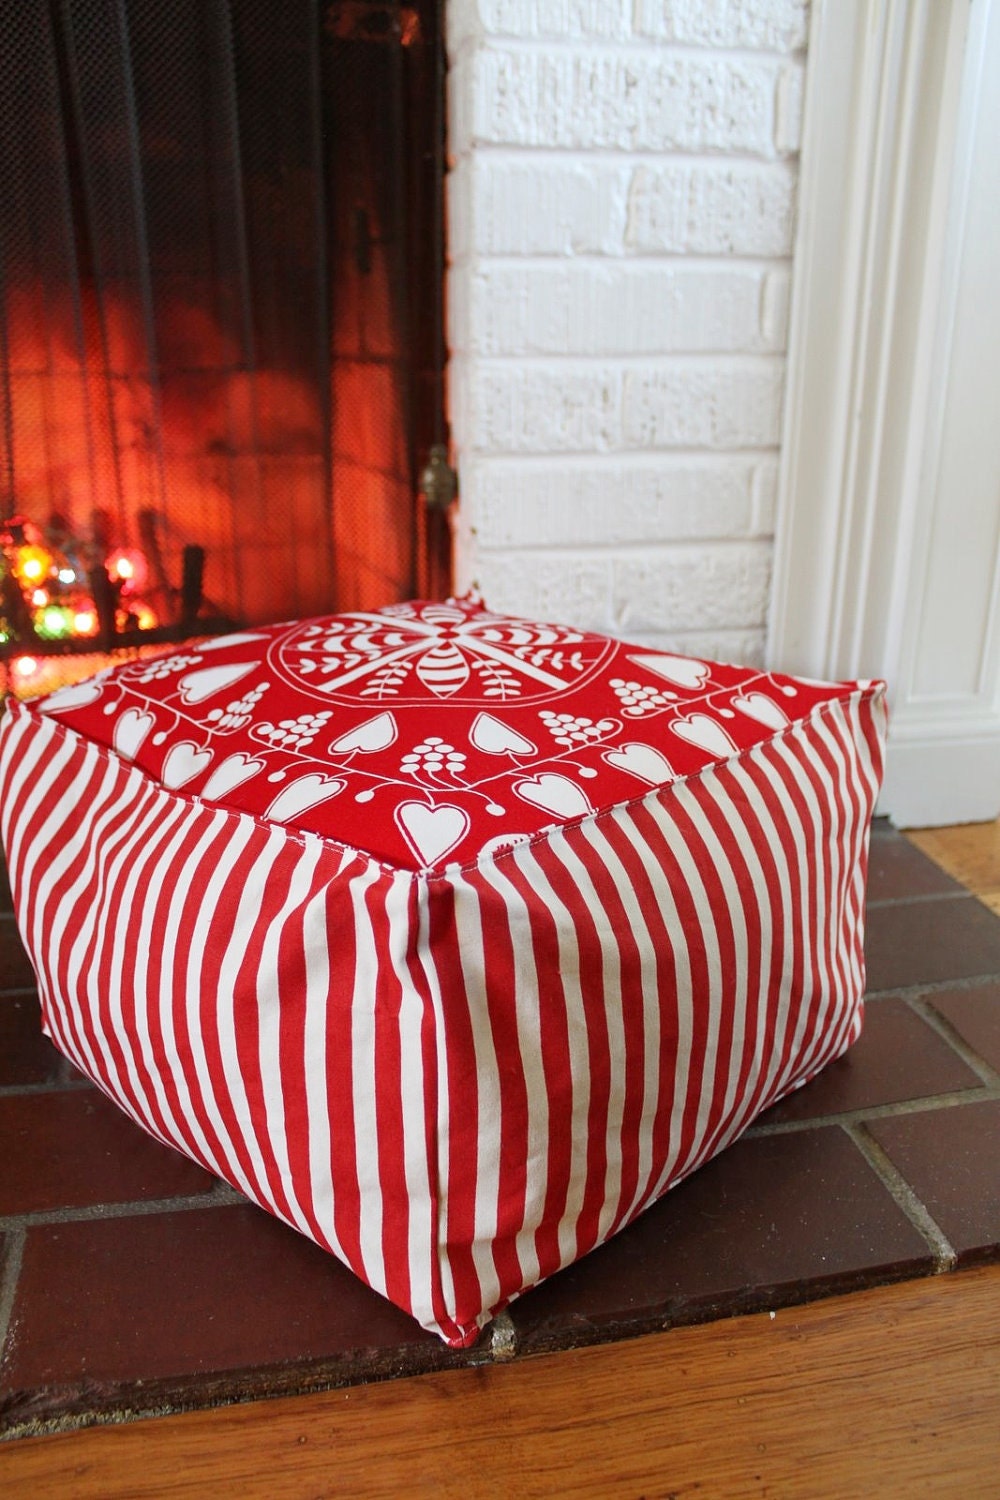 Hearts and Stripes Todd...
$45.00
|  Cotton Crochet Dishclot...
$10.00
|  Christmas Headband - Re...
$12.00
|
Treasury tool supported by the dog house
Sunday, November 25, 2012
Cyber Funday!
Did you survive Thanksgiving? Black Friday? Small Business Saturday?
We at the Bean household held it down, inlaws and all! Phew!
We had a lovely dinner, plenty of crazy kiddo play time, and good long naps.
We avoided Black Friday altogether in favor of my very favorite
almost Christmas tradition, Cyber Monday!
I've been stockpiling emails from my favorite retailers and bookmarking coupon codes, as well as creating some of my own! Here's one you can use for 15% off any purchase in my shop through tomorrow! Personalized stationery makes a great stocking stuffer, as does a membership to my Card of the Month club! "What's that?" you say? Buy a membership as a gift and your mom or sister or bestie will receive one handmade card with postage each month! Awesome sauce:)
 |
| Visit the Shop! |
Fell free to Pin or Facebook or otherwise share this code with all of your buddies!
What other great deals will you be hitting up tomorrow?
Monday, November 19, 2012
Thanksgiving for Dummies: REDUX
Yet again, I have been slipping seriously on the blog front. Thanks to that dastardly Hurricane Sandy, a house full of guests living in our home for a week, gas lines, a sick kid, and a new day care buddy to prep for, I've been too busy to even remember I have a blog. I have been crafting and cooking, and occasionally taking actual photos of these things. Writing about them is a challenge I still don't have time for though! Especially since we are hosting dinner for Thanksgiving this year. I have a few days left to prep, which has me looking back... Thankfully, I already have this list, so I just have to write out the food list:) Here's the perfect prep list and plan for your holiday dinner, copied from two years ago!
Thanksgiving for Dummies:

Monday (Crap, that's today. Get your butt in gear!):
- Make your list, check it twice, then go shopping. Have everything you need ready to go by checking this list against your fridge and pantry contents and your recipes. You do not want to be running off to the store in the middle of prep.
- Make sure you delegated the appetizers to someone else. And a salad. And maybe some desserts. This isn't a soup kitchen.
Tuesday:
- This may sound silly, but figure out what baking/serving dishes you'll need for each dish. It sucks to have a pan full of something ready to bake and have no empty baking dish to put it in. This was my first lesson from Germany. I baked stuffing in a lid. Yup.
- Make My Aunt Cynthia's Party Potatoes. These are quick, easy, and crowd pleasing, not to mention sinfully delicious. Wrap them in foil and stick them in the fridge.
- Make Cranberry Citrus Relish.
Wednesday:

- Prep your vegetables for my Roasted Root Vegetables with Herbs de Provençal by peeling and cutting everything. Toss them into a baking dish, wrap with foil and stick it in the fridge.
- Mix up your turkey rub from My Favorite Roast Turkey. Guess where you should stick it?
- Make dessert. My mom's crazy amazing Frosted Apple Squares should do the trick. These actually don't need refrigeration, so just lay them on your serving platter and wrap well with plastic wrap.
- Need something a little more decadent? Make this Gingersnap Cherry Cheesecake. Stupid delicious. Stick it in the fridge.
- Pull out and clean a cooler. This will save your sanity whether or not you have big drinkers. You'll need that fridge space, so beers, juice, and soda can chill in a cooler so that people will stay out of your way :)
- Set your table. I'm serious.
Thursday:

- In the morning: Take the butter mixture for your turkey out of the fridge to soften. Eat an apple square for sustenance. Put on a pair of stretch pants and some makeup. You're all class.
- 2-3 hours before dinner: Finish workin' on that bird and stick it in the oven. Have a glass of wine.
- 1.5 hours before dinner: Make dressing. I love this Savory Mushroom Dressing recipe. My mom always did stuffing inside the turkey, but I think it's a messy pain in the ass. I use apricot or pear nectar in place of the cognac (save your pennies for the good wine). Have a glass of wine.
- 45 minutes before dinner: Finish the veggies and stick them in the oven. Refill your glass of wine while you set out all of the accouterments, like cranberry relish, rolls, and the good ol' pickle tray.
- 30 minutes before dinner: Grab your potatoes from the fridge. Stick them in the oven.
- Done. Eat, drink, and be merry. Be thankful for those stretch pants. And the wine.
 Now for those of you who are insane and also want to take on some fun crafty things in the midst of the week's business, here you go. Tasty links for funsies you can do with your kids or delegate to your kids to keep them out of your hair:
Printable Blessings Tags from Whipperberry. Use them for seating cards, let kids create their own blessings tree or board, whatevs.
More Free Printables from It Is What It Is. Love the colors on these!
Pom Pom Turkeys from Martha. For adventurous folk or independently crafty kidlets.
Mod Podge Pumpkins from Simple Mommy Secrets. An awesome way to use those baby pumpkins you may still have sitting around from Halloween. I do.
Bottom Line? Enjoy yourself, even if you need to medicate to handle your family. Be thankful that you get to do this at all, and say a little prayer for those who can't. That's what it's all about anyway.
This post is linked to:
Saturday, September 29, 2012
Etsy NJ - Go Team, Go!
Lots of food, beer, live music, art, crafts, and the Etsy tent,
manned by lots of lovely members of the Etsy NJ team, including moi:)
It was so much fun, and HUGE props to Jacqualynn for pulling it off!
(Your mom is super nice, by the way.)
Check out some of the photos of the day!

Life-sized treasuries! How cool is that?


Demos! This one is jewelry demo by Jaime Sia.

The Raffle Table. Hi Jenn of Paperchoke!
Oh, and I want that little girl's hoodie. I'm so excited for the new Carlo's to open in Ridgewood:)

And the obligatory boy photo.
Jude was such a trooper on our 2 plus hour drive!
It turns out that highway rest stops can make
entertaining playgrounds if you really need them to.
Wednesday, September 26, 2012
Rethinking Greens (and other shades of vegetable)

Sometimes you have to get a little creative when it comes to making sure your picky little gets a balanced diet. You should also start early and try try again. I can't imagine trying to get a two year old to eat broccoli if he's never had it before. Or never giving it to him again after his first refusal. It took me years to eat beets and I'm a food freak. Now I love them! Our kiddos are no different. They have preferences and moods, and the older and more communicative they get, the more they let us know about them. Now that I know this I stick to a few basic rules:
1. BE PREPARED. Keep the freezer stocked with a variety of frozen veggies (some chopped and some pureed) and anytime you prep and cook veggies for yourself, make extra. I always have a backup plan for a meal in case food flies.
2. SEASON WELL. Don't be afraid of your spice cabinet. Would you eat plain cooked carrots? I wouldn't. Salt, pepper, garlic, cinnamon and curry powders are your friends. So are cumin, chili powder, ginger, and cayenne. If your kiddo refuses something, switch up the spice and try again! You never know what he (and you) may end up loving.
3. DON'T GET DISCOURAGED. I can't tell you how many times I have prepared a meal and though, "This will be a big hit!" only to find it strewn across the linoleum as soon as I turn my back. It won't kill you or your child to eat PB&J one more night, as long as you pick up and try again tomorrow. Food is fun and not worth getting mad about!
With all of that in mind, here are my favorite ways to get Jude to get his daily fill of veggies, even if he doesn't know it.
BREAKFAST
4. Eggs. Easy peasy. My go to add ins are greens. I keep chopped kale and spinach in bags in the freezer, sprinkle a few tablespoons into a hot frying pan and pour a scrambled egg over the top. Cook until firm and flip, season with salt and pepper, and cut it into squares to serve. Way less mess than scrambled eggs, and you can add some cheese, too! Sometimes I use leftover veggies from the night before, chop them tiny, and add those instead of the greens. Then I make a second one for me:)
5. Muffins. Not as easy peasy as eggs, but almost. Especially considering you can make one batch and freeze them for a few weeks. Muffins are a fantastic way to add veggies like carrots, zucchini, or winter squash to your breakfast routine. Just make sure you are using a recipe low in sugar and full of whole grains.
6. Oatmeal. Yup, I said oatmeal. My favorite Pumpkin Pie Oatmeal recipe contains a full veggie serving, and if you leave out the sugar, it's perfect for your babe. You can add a little applesauce if you want it sweeter. Try replacing the pumpkin with sweet potatoes, yams, or butternut squash if you have it. Jude likes his with chopped walnuts and a dollop of yogurt.
7. Pancakes. Yup, I said pancakes, too. Or waffles! Think of them as muffins, and add grated veggies to your batter! I especially love whole wheat waffles with shredded carrot, a dash of nutmeg, and a tsp. of cinnamon added to the batter. Serve these with cream cheese and it's like having carrot cake for breakfast. Ok, not really.
LUNCH AND DINNER
8. Pasta. I don't know a kid who won't eat pasta. Any vegetable that can be pureed can be pasta sauce. Toss ravioli with pureed broccoli, fusilli with pureed peas, pastina with pureed squash. Whatever. If your kid is like mine, mix half of your puree with tomato sauce and he'll never even notice. I also grate lots of parmesan cheese over the top, of course.
9. Quesadillas. Or dillas as they are called here. Spread your cooked chopped veggie or puree on one half of a tortilla, top with shredded cheese and fold over. Slide the tortilla into a pan over medium high heat and cook until lightly browned, about 3 minutes. Cook another 3 or 4 minutes until cheese melts. Cut into strips to serve.
- Try serving with dips, like salsa, sour cream, or yogurt. Just get ready to clean it off your ceiling.
- These are awesome for adding in protein from mashed beans, chopped leftover chicken, or ground beef.
10. Pizza. We have English Muffin pizzas once a week. Smear a toasted english muffin with tomato sauce, top with chopped cooked veggies or puree, sprinkle with shredded cheese and pop under the broiler for a few minutes until the cheese is melted. Slice into squares to serve.
- Our favorite is eggplant pizza with goat cheese, but again, my kid will eat anything with tomato sauce, so I've snuck in chopped zucchini and broccoli, too.
11. Sandwiches. Just think of purees as spreads. A smear of pureed peas on a ham sandwich works, as does carrot puree with turkey. If you're feeling ambitious, go for sliced beets and goat cheese (or cream cheese) or avocado and chicken. I love the teeny whole wheat pita bread you can get at Trader Joes, because for some reason Jude won't pull them apart. With bread, I squeeze the sandwich together and cut it into cubes. If he can pop it into his mouth, he usually won't bother peeling back the layers. Usually.
12. Meatballs. Another fantastic make ahead winner. Add grated or finely chopped vegetables to your favorite meatball or meatloaf recipe. I try to stick to a 2/3 meat and 1/3 veggies ratio to make sure they hold together well. You can bake them on a sheet tray, or fill muffin tins and then freeze them for later.
DESSERT
Ok, why not? If all else fails, and there may be days (or weeks) when it does, you may feel the need to treat your kiddo and yourself with something sweet. If it is the only way your little will eat a vegetable, so be it. It's also just another way to sneak in a serving.
13. Cake. I have a slammin' Chocolate Zucchini Cake recipe you should definitely try out for yourself. If you want to give it to your child, I'd suggest replacing sugar with applesauce or juice concentrate, and swapping the white flour for whole wheat. But that's just me.
14. Cookies. Just as with pancakes, waffles, or muffins, you can add veggies to just about any cookie recipe. Have a chocolate chip recipe you love? Toss in a cup of shredded zucchini. Amazing. For realz. Or try this one from one of my favorite food mama blogs, Two Peas and Their Pod.
15. Ice Cream. Or FroYo. One of my favorite ice cream flavors ever was a long ago discontinued Newport Creamery flavor called Indian Pudding that was full of pumpkin goodness. If you aren't so into making your own ice cream try this: Blend 1/2 cup of pureed pumpkin and 1/2 cup plain Greek yogurt in a bowl. Stir in 1/2 tsp. cinnamon and a pinch each of ground ginger and nutmeg. Spoon into snack sized ziploc bags and roll the bags up tightly to make all of the mixture form a tube. Tape up the roll and stick it in the freezer for an hour or two. When you take it out of the freezer you can snip off one end and squeeze it out, homemade pumpkin pie go-gurt!
What's your favorite tip for getting your kiddo to eat veggies? Please share it in the comments so I can add it to my box of tricks!
What's your favorite tip for getting your kiddo to eat veggies? Please share it in the comments so I can add it to my box of tricks!
Monday, September 24, 2012
Where I've been...
...holed up in the basement 'craft room' of our new house, getting ready for this:


My very first craft show! The Ridgewood Fall Arts and Craft Street Fair. Yes, it takes a couple of months to stock up enough inventory when you have a toddler and a new house. I still can't believe I pulled it off. E helped with the early AM set up (including pom fluffing, which he is crazy good at. Definitely a secret talent.) and my mom helped man the booth for most of the afternoon and broke it all down with me. We borrowed the tent and tables from my awesome friend Jenn, and the day amazingly went off without a hitch.
Here are some shots of the booth inside:

Cupcake poms, gift tags, chalkboard labels, and plantable seed paper cards.

Custom invitation samples, Halloween goodies, and screenprinted cards (personalized on the spot, which was the day's best seller!)

Holiday cards and The Basket of Misfit Cards.
All of my test prints and misprints were on sale, two for a dollar. People love cheap:)

And here is the banner, which I painted and my lovely mother sewed up for me. Now how do I make this my new shop banner? Because I think I need an update.
I designed a ton of new cards for this fair, and I have quite a bit left over. Keep your eye on the shop, because I will have many new items posted by the end of the week! I'm also going to do a coupon code for those of you who have stuck around and read this blog for so long, so pop over to Facebook for that, too!
Sunday, August 12, 2012
Blast from the past

Last summer I made ice cream constantly. The summer before that I made a lot of ice cream, too. This year I've been seriously slacking in the frozen treats department. I do believe that this ice cream makes up for it. I wanted to try two new things this time. 1. Make an ice cream without any sugar. You know, so I won't feel so guilty feeding it to the boy. And 2. Make a fruity flavor I've never made before.
The latter part was easy, since all I've been craving lately is Chelo's Banana Berry Pie. I worked there for an embarrassingly long part of my youth, and that pie basically fueled my double shifts. It's the stuff summertime dreams are made of. I figured since I can't have a slice or six when I need a fix nowadays, I can make it into ice cream.
Making sugar free ice cream was another issue. I refuse to use sugar substitutes, so I had to try out a juice concentrate. Cascadian Farms makes an organic grape juice concentrate without any added sugar (it's what I use for my Baby Cakes) so I started there. Subbing juice concentrate for sugar isn't such a big deal, really. You just use about 3/4 of a cup in place of every 1 cup of sugar. I was just concerned that the water in the concentrate would make for icy ice cream when what I want creamy ice cream. I figured that little trick out. The other thing about fruit ice creams is that I hate chunks of frozen fruit. It's like chomping on rocks. Hence the pureeing steps below. If you like chunky fruit in your ice cream, by all means, fork mash it, but don't say I didn't warn you.

2 cups heavy whipping cream
2/3 cup half and half
1 can of organic grape juice concentrate, thawed and divided (see below)
1 ripe banana
1 cup mixed berries (I used blueberries, strawberries, and cherries)
Preparation:
Take your can of grape juice out of the freezer and stand it up on one end in the fridge overnight to thaw. This will give you a layer of juice at the top and a layer of thick concentrated grape sludge (for lack of a better word) at the bottom. When you are ready to make your ice cream, pour off the juice and reserve for another use. Measure out 1/2 c. of the sludge into a large bowl. Whisk in cream and half and half until well blended and place bowl in the fridge.
Set up your ice cream maker. If using the KA attachment, make sure it is locked closed and set to the lowest speed. Otherwise, follow your ice cream maker instructions:) Pour in the cream mixture slowly and set a timer for 20 minutes.
Puree banana and set aside. Puree berries and set aside. Once ice cream has mixed for about 20 minutes, it should be reaching a soft set. Pour in the banana puree and half of the berry puree. Continue mixing the ice cream for another 5-10 minutes until it begins to firm up. Turn off machine and fold in the remaining berry puree. Transfer ice cream to a freezer safe container to freeze, or serve immediately.
Saturday, August 11, 2012
Gimme some
Because as my friend Andrew pointed out, "How can I have s'more when I haven't had any?"

Yes, yesterday was National S'mores Day. If you read food blogs, I'll bet you were smacked in the mouth with all manner of fabulous takes on the classic summer sweet treat. S'mores brownies, s'mores cookies, s'mores cupcakes. The best thing to serve with all of those choices? S'mores ice cream, of course.
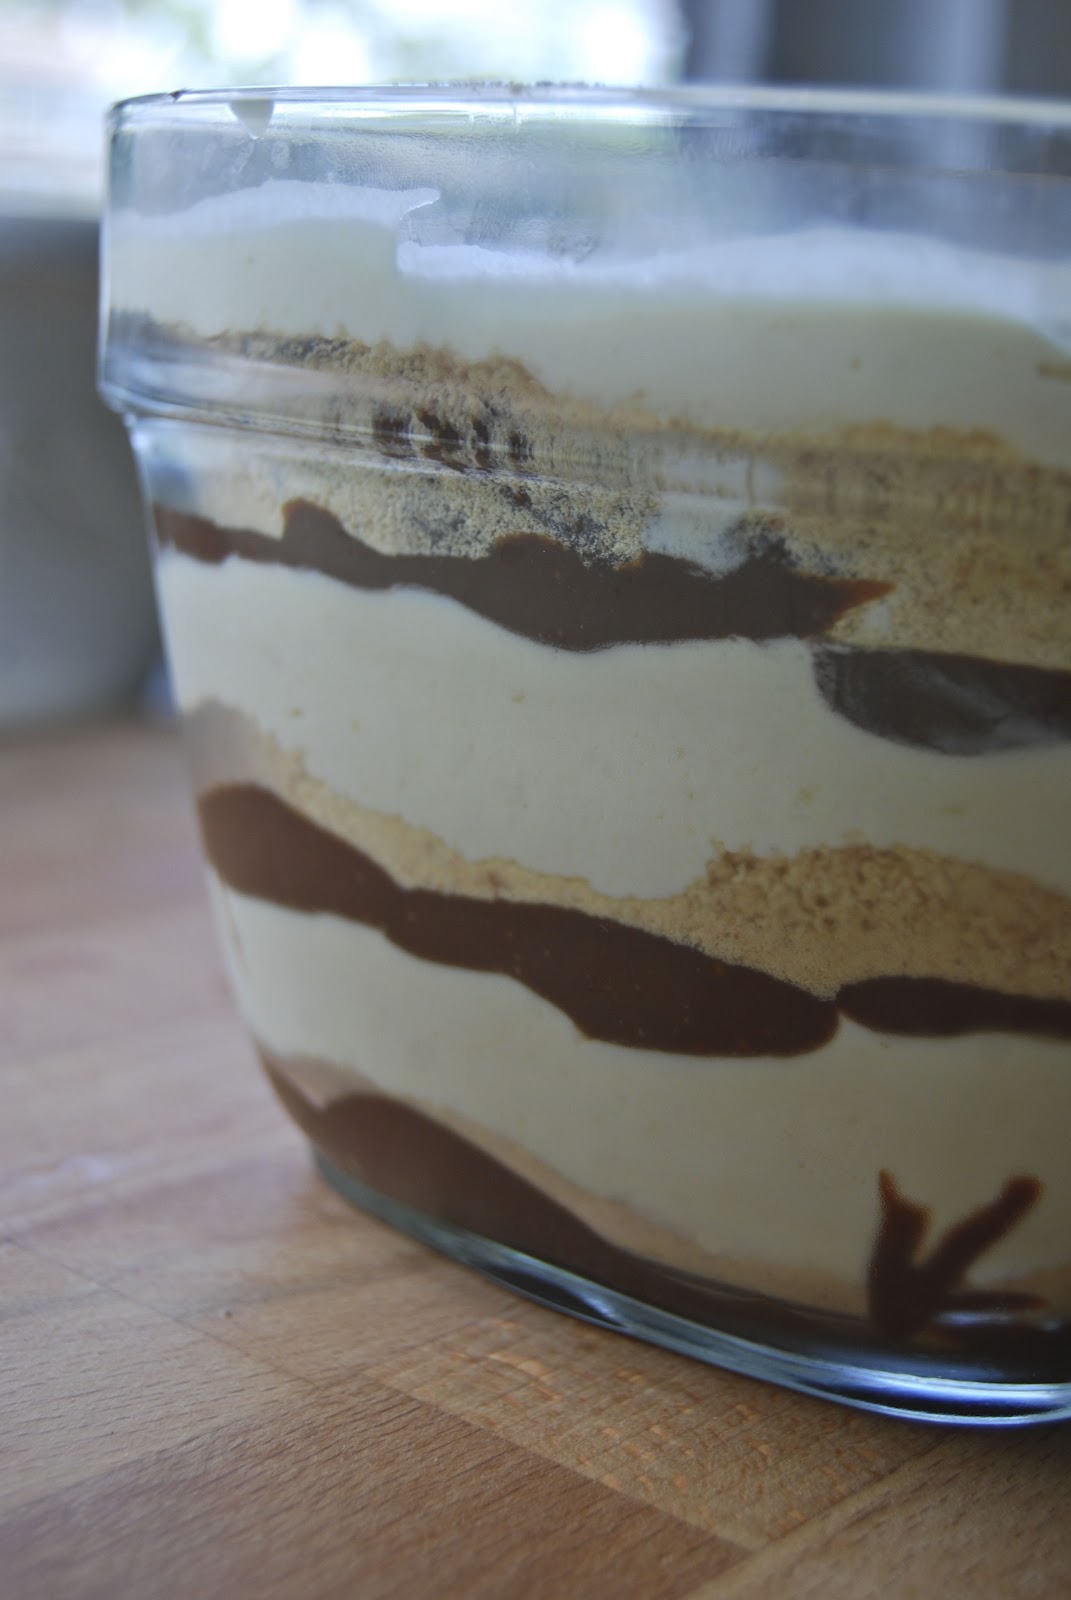
I'm a fan of Ben and Jerry's S'mores ice cream, but as much as I love it, it just doesn't taste like s'mores. Not really. To me the star of s'mores is not the chocolate (which is the dominant flavor of their chocolate based version), but the roasty, toasty marshmallow. In order to pay true homage, you just have to have toasted marshmallow ice cream. Don't worry, the chocolate and graham is there in force, but they are second and third fiddle, as they should be:) This ice cream is so good, you may have a problem getting it from the bowl into the freezer.
S'mores Ice Cream
Toasted Marshmallow Ice Cream with Graham Cracker and Chocolate Fudge Swirls
Ingredients:
For the chocolate fudge:
1 c. sugar
2 Tbls. all purpose flour
1/3 c. cocoa powder
1 c. milk
For the base:
2 cups heavy cream
2/3 c. half and half
1/2 c. granulated sugar
1 10 oz bag of marshmallows
butter
1/2 c. graham cracker crumbs
Preparation:

 Transfer marshmallows to a blender. Add cream, half and half, and sugar. Blend on high speed until smooth. Transfer to the refrigerator to chill for an hour.
Set up your ice cream maker. Remove ice cream base from the fridge and whisk it until smooth (it may seize up a bit as it chills). Pour into the machine and process according to your instructions. (If you have a KA ice cream maker, it will take 15 minutes on the lowest setting.)
While the ice cream blends, make the chocolate fudge. Mix ingredients in a small sauce pan and bring to a boil over medium heat, whisking constantly. Boil until sauce begins to thicken. Remove from heat. Sauce will continue to thicken as it cools. Once the ice cream has finished processing, spread 1/4 cup of chocolate fudge in the bottom of a 1 quart container. Sprinkle with 1/3 of the graham crackers. Spread 1 third of the ice cream on top. Repeat layers, ending with ice cream on the top. Freeze for an hour or two to set before serving.
Thursday, July 19, 2012
Bean! Beans! The... oh, you get it.

Beans are awesome. Protein powerhouses so versatile and delicious that I could probably eat them is some form every day. The boy who was once a bean himself is confused by them. He loves them, he just doesn't know it. Give him a bean of any kind in its original form and he'll likely flick it across the room. Attempt to feed him a partially mushed bean and he will somehow swallow all but the skin, which he will then pull out of his mouth and flick across the room. Pureed food is not his bag anymore, but that's the only way he'll eat a bean. Luckily beans from a can are practically mush anyway, so a few additional ingredients makes for easy mealtimes. I fricking love black bean soup. I love making it from scratch with dried beans, but this way is just perfect for babies. Quick and easy, and you can adjust the seasonings of course. But really, this is a great way to introduce a little kick, so go for it!
Baby Black Bean Soup
Ingredients:
2 cans of black beans, drained and rinsed
1 quart chicken or veggie stock
1 small can of tomato paste
1/2 red pepper, chopped
1 tsp. cumin
1/2 tsp. red pepper flakes (optional, but why wimp out?)
salt and pepper to taste
Preparation:
Add beans, stock, tomato paste, and pepper to a sauce pan and bring to a boil. Add salt and pepper to taste, cumin, and red pepper flakes. Reduce heat to low and simmer, stirring occasionally, for 10-15 minutes. Remove from heat. Using an immersion blender or food processor, pulse a few times to crush most of the beans. If you have a wee little one, blend until smooth. Serve with a good dollop of whole fat Greek yogurt or some shredded cheese.
Subscribe to:
Posts (Atom)